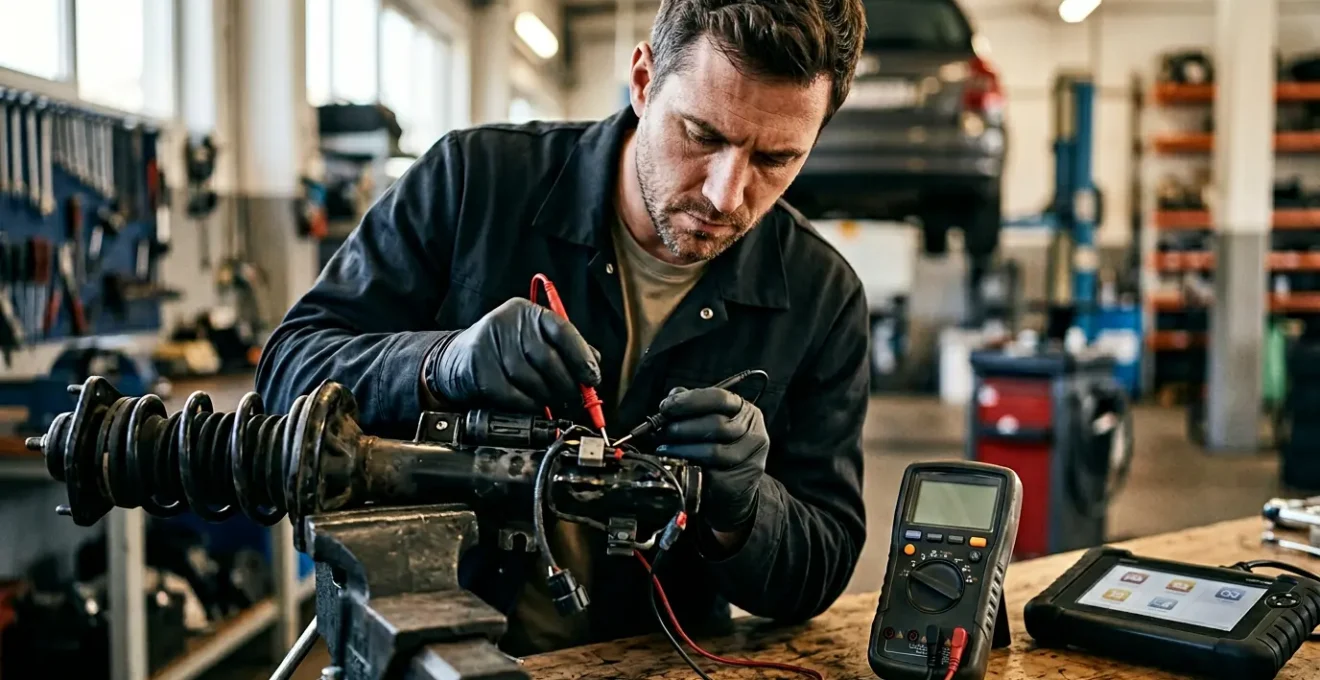
The « Suspension Fault » warning light is often a misleading signal designed to sell expensive shocks, but the true failure is frequently a much cheaper electrical or sensor-related issue.
- Most « failed » adaptive dampers are electrically compromised, not mechanically worn out; issues like corroded connectors or broken wires are common culprits.
- An unlevel stance or pulling is often due to an uncalibrated ride height sensor, not a faulty air spring or shock, and can be fixed with software.
Recommendation: Before authorizing any major replacement, insist on a systematic electrical and sensor-level diagnosis to isolate the precise point of failure.
The sudden appearance of a « Suspension Fault » or « Service Suspension System » light on the dashboard of a luxury SUV is an experience that induces a specific kind of dread. It immediately conjures images of a four-figure repair bill, with a service advisor grimly explaining that all four corners of your advanced magnetic or air ride system need to be replaced. This is the common narrative, and for dealerships, it’s a profitable one. The default solution is almost always a complete, and costly, component swap.
But what if this narrative is fundamentally flawed? While it’s true that these complex systems can fail, the root cause is rarely the catastrophic mechanical failure that warrants a full replacement. More often, the culprit is a less dramatic, and far less expensive, problem hiding in plain sight: a corroded connector, a frayed wire, or a sensor that has simply lost its calibration. These systems are more computer than classic hardware, and their failures are often electrical, not hydraulic.
This is where a diagnostic-first approach becomes critical. The key to avoiding an unnecessary and expensive repair is not to second-guess the warning light, but to challenge the proposed solution. By understanding the system’s common electrical failure points, you can shift the conversation from « replacement » to « repair. » This guide is built on a specialist’s perspective: the fault light isn’t a diagnosis, it’s the starting point of an investigation. It’s a clue that, when followed correctly, can lead to a precise, affordable fix that restores factory performance without draining your bank account.
In the following sections, we will dissect the most common failure modes, provide actionable diagnostic steps, and weigh the true costs and benefits of various repair strategies. This is your roadmap to taking control of the repair process and ensuring you only pay for what is truly broken.
Summary: How to Fix Suspension Faults Without Replacing Shocks
- Why Magnetic Dampers Leak Less but Fail Electrically More Often?
- How to Recalibrate Ride Height Sensors if Your Car Leans to One Side?
- Electronic Shocks vs. Passive Delete Kits: Which Is the Smarter Repair for Old Cars?
- The Cable Routing Error That Severs Connections to Adaptive Shocks
- When to Use « Comfort » vs. « Sport »: Impact on Damper Life and Passenger Nausea?
- Why Ignoring That « Clunk » Over Bumps Could Lead to Wheel Separation?
- When to Calibrate ADAS: Is It Necessary After a Wheel Alignment?
- Why Your Lane Keep Assist Pulls to the Right After Windshield Replacement?
Why Magnetic Dampers Leak Less but Fail Electrically More Often?
Unlike traditional hydraulic shock absorbers that wear out and leak oil over time, magnetorheological (MR) dampers, such as the widely used MagneRide system, have a different life story. Their design is inherently more robust against leaks because the magnetorheological fluid inside is less prone to breaking down and escaping. However, this mechanical resilience hides an electronic vulnerability. The very feature that makes them « smart »—their ability to change damping characteristics in milliseconds—is also their most common point of failure. This is why a « Suspension Fault » on a vehicle with MR shocks is rarely due to a puddle of fluid on the garage floor.
The failure is almost always electrical. Each MR damper is connected to a control module via a wiring harness and a connector located at the top of the shock body. This connector is exposed to the harsh environment of the wheel well: water, salt, dirt, and constant vibration. Over time, moisture ingress leads to corrosion on the delicate electrical pins, creating a poor or intermittent connection. The control module loses communication with the damper, assumes it has failed, and triggers the dreaded warning light. In many cases, the damper itself is mechanically sound, but its brain has been disconnected. According to some industry reports, these electronic failures are a common issue, often appearing after the vehicle passes 75,000 miles.
This is a critical distinction for cost-conscious diagnosis. Instead of immediately quoting a new shock, a savvy technician will first inspect the electrical integrity of the system. This involves unplugging the connector, checking for green or white crusty corrosion, and ensuring the pins are clean and making solid contact.
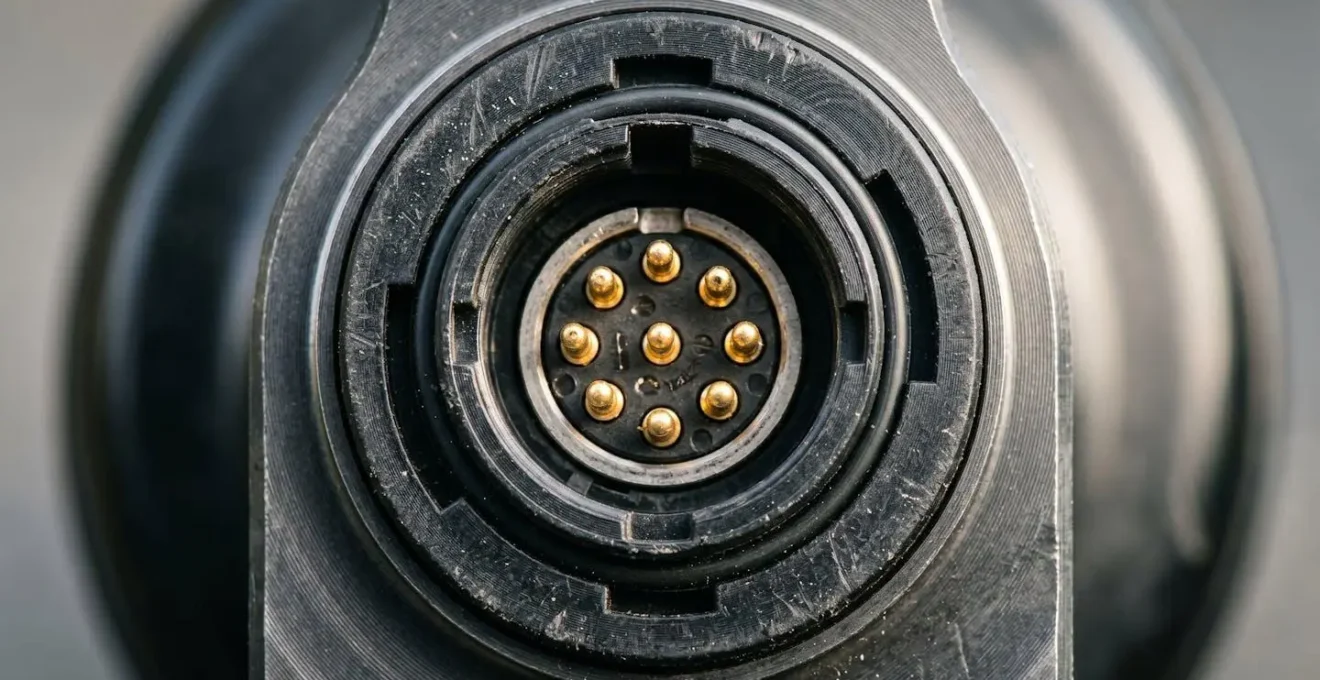
As the image above illustrates, the point of failure is often microscopic. Cleaning the connector with electrical contact cleaner and applying dielectric grease can sometimes be enough to restore the connection and clear the fault. In more severe cases, a new connector pigtail may need to be spliced in—a repair that costs a tiny fraction of a new damper. The primary takeaway is to always suspect the connection before condemning the component.
How to Recalibrate Ride Height Sensors if Your Car Leans to One Side?
A car that visibly leans to one side or sits at an incorrect height is a classic symptom of an air or adaptive suspension problem. The owner’s first thought—and often a shop’s first quote—is for a failed air spring or a collapsed strut. While this can be the cause, a far more common and cheaper culprit is a loss of calibration in the ride height sensors. These small, lever-actuated sensors, one at each corner, tell the suspension control module how high the chassis is sitting relative to the wheels. If a sensor provides an inaccurate reading, the system will incorrectly inflate or deflate an air spring, or adjust a damper, trying to « correct » a non-existent problem.
This is why system-level calibration is not just a final step, but a primary diagnostic tool. Simply replacing parts without telling the system its new « zero point » will not fix the problem and can even create new ones, as evidenced by a common real-world scenario.
Case Study: The Jaguar XJ8 with Misaligned Headlights
In a documented case from a report on a 2004 Jaguar XJ8, a technician replaced a rear air strut and control arm after curb impact. Despite the new parts, the vehicle’s automatic headlights were aimed incorrectly. There were no fault codes, but the system was clearly not level. Instead of further part replacement, the technician performed a complete ride height calibration using the factory scan tool. This procedure reset all sensors to a new baseline. After the calibration was complete, the vehicle sat perfectly level, and the headlight aim was corrected, proving that the system was simply operating on old, incorrect data.
Recalibrating these sensors requires a specific procedure and a diagnostic scan tool with the appropriate software (like VCDS for Audi/VW or ISTA for BMW). It is not a task that can be done with a wrench, but it’s a software fix for what appears to be a hardware problem. The process generally involves parking the car on a perfectly level surface, measuring the physical height at each corner from the center of the wheel to the fender lip, and inputting these values into the scan tool. The software then recalibrates the sensors, establishing the new correct baseline for a level vehicle.
Electronic Shocks vs. Passive Delete Kits: Which Is the Smarter Repair for Old Cars?
When faced with a failed electronic shock on an older luxury vehicle, the owner arrives at a crossroads. The dealer-recommended path is to replace the unit with an OEM part, a solution that restores original functionality but comes with a hefty price tag. For a single corner, these replacement costs can range from $1,000 to $3,500, and often it’s recommended to replace them in pairs. This financial shock leads many to explore the world of « delete kits » or « conversion kits, » which replace the sophisticated electronic dampers with traditional, non-adjustable (passive) shocks.
The appeal of a delete kit is purely financial at first glance. For the price of one electronic shock, you can often replace all four corners with passive units. However, this is not a simple « one-for-one » swap. The « smarter » repair depends entirely on the owner’s long-term goals, tolerance for compromise, and understanding of the performance-cost delta. Simply installing passive shocks without addressing the electronics will trigger a persistent « Suspension Fault » warning light and often puts the vehicle into a « limp mode » with a harsh ride. A proper delete kit must include electronic modules that plug into the factory harness to trick the computer into thinking the electronic shocks are still there, thus preventing error messages.
The trade-off is fundamental: you gain long-term reliability and lower future replacement costs by using simple, robust passive shocks. However, you permanently lose the very feature that defined the vehicle’s ride quality—the ability to adapt to road conditions, reduce body roll in corners, and provide a smooth ride on the highway. This directly and significantly impacts the car’s resale value, as savvy buyers of these models specifically look for this feature.
The following table breaks down the decision-making matrix, comparing the different repair options beyond just the upfront cost.
| Repair Option | Upfront Cost | Long-term Reliability | Performance Impact | Resale Value Impact |
|---|---|---|---|---|
| OEM Replacement | $800-$1,000 per shock | Limited by electronic failure modes | Factory-spec performance restored | Maintains full value |
| Rebuilt OEM | $300-$500 per shock | Moderate (depends on rebuild quality) | Near-OEM performance | Minimal impact |
| Delete Kit (Passive) | $2,000-$2,500 complete | High (conventional shocks) | Loss of adaptive damping | Significantly reduced (10-20%) |
| Delete Kit + Coding | $2,500-$3,000 complete | High (no warning lights) | Fixed damping rate only | Reduced (15-25%) |
Ultimately, the « smarter » choice is subjective. For an owner planning to keep the car for many more years and who prioritizes reliability over performance, a high-quality delete kit can be a logical choice. For the owner who values the vehicle’s original character and resale value, repairing the electronic system or using rebuilt OEM shocks is almost always the superior financial and experiential decision.
The Cable Routing Error That Severs Connections to Adaptive Shocks
Sometimes the cause of a « Suspension Fault » is not a failed component or a corroded connector, but something far simpler and more insidious: a mechanical failure of the wiring itself. The wiring harness that connects the adaptive damper to the car’s chassis is subjected to millions of cycles of suspension travel, steering input, and vibration. To prevent damage, these wires are meticulously routed and secured with clips and ties at the factory. However, any time work is done in the wheel well—a brake job, a ball joint replacement, or even a previous shock replacement—there’s a risk of this routing being disturbed.
A common and easily overlooked error is failing to re-secure the harness in its original clips. A loose wire can then rub against a moving suspension component, the inside edge of the tire, or the CV axle shaft. Over thousands of miles, the insulation is worn away, leading to a short circuit or a complete break in the wire. From the control module’s perspective, this is identical to a failed shock: the signal is lost, and a fault is triggered. In the world of automotive electronics, wear and tear is identified as the most common problem for wiring harnesses, and improper routing dramatically accelerates this wear.
This is a classic example of where failure mode isolation saves a fortune. A shop might see the fault code for a specific damper and immediately quote a replacement. But a diagnostic specialist, following a process, would first perform a visual inspection of the entire wiring path from the shock to the chassis. They would look for:
- Wires hanging loose instead of being clipped securely to the strut body or control arm.
- Signs of abrasion or shiny spots on the black plastic wire loom, indicating it’s been rubbing against something.
- Incorrectly routed wires that are stretched taut at full suspension droop or full steering lock.
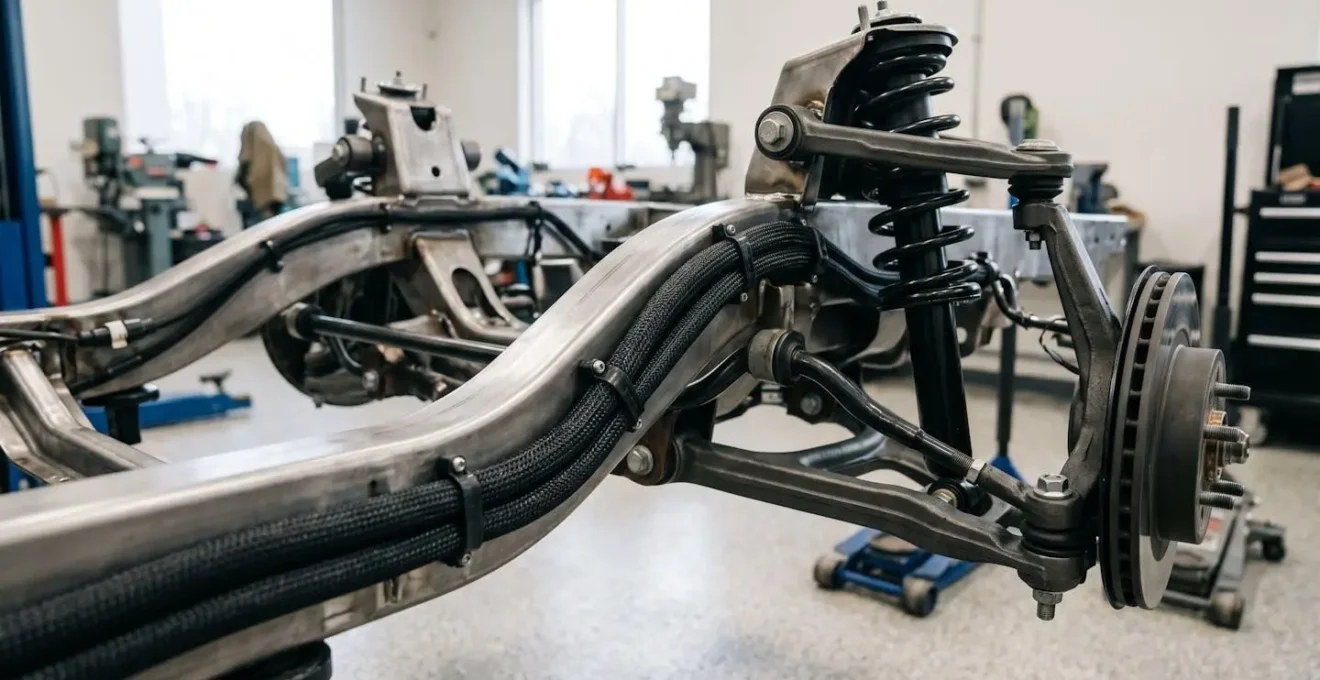
The repair for this issue is often simple and inexpensive. It might involve repairing the broken wire with a solder splice and heat shrink tubing, then meticulously securing the harness back in its original, protected path. This restores full functionality for the cost of an hour of labor, versus hundreds or thousands for a new shock that was never needed in the first place. It underscores the importance of a visual, mechanical inspection as part of any electronic diagnosis.
When to Use « Comfort » vs. « Sport »: Impact on Damper Life and Passenger Nausea?
Most vehicles with adaptive suspension offer driver-selectable modes, typically labeled « Comfort, » « Normal, » or « Sport. » These settings are not just marketing gimmicks; they fundamentally change the behavior of the magnetorheological or air suspension system. However, many drivers are unsure of how to use them effectively, and wonder if they might be « wearing out » their expensive shocks by using Sport mode too often. The truth is more nuanced and relates to the system’s intended purpose and operational design.
As researchers note, the primary goal of these systems is the « improvement of the ride quality by controlling unwanted vibrations. » In a 2019 study, experts from the Frontiers in Materials Research journal elaborated on this mission:
MR dampers for vehicle suspension applications have been commercialized and installed in numerous vehicles of different types, such as passenger vehicles and sport utility vehicles, for the improvement of the ride quality by controlling unwanted vibrations.
– Frontiers in Materials Research, Ride Quality Control of a Full Vehicle Suspension System Featuring Magnetorheological Dampers
Regarding lifespan, consistent use of Sport mode does not significantly shorten the mechanical life of the damper compared to Comfort mode. While Sport mode does use higher electrical currents to stiffen the MR fluid, the dampers are designed for this duty cycle. The mechanical wear from moving up and down is the primary limiting factor, and experts indicate shock absorbers typically last between 31,000 and 50,000 miles (50,000-80,000 km) regardless of the mode used. The electrical components are far more likely to fail first.
The real impact of these modes is on passenger experience. « Comfort » mode allows for more body motion and a softer response to bumps. This is ideal for smooth highways but can lead to a floaty, disconnected feeling on undulating roads, which can induce motion sickness in some passengers. « Sport » mode, by contrast, ties the body down, reacting instantly to bumps and minimizing body roll. This provides a greater sense of control and can actually be *more* comfortable on rough or winding roads by preventing the large, slow body motions that cause nausea. The key is to match the mode to the road, not to try and « save » the shocks. Using Sport mode on a bumpy road may feel firmer, but it’s often what the system is designed to do to maintain control.
Why Ignoring That « Clunk » Over Bumps Could Lead to Wheel Separation?
Before diving into complex electronic diagnostics, it’s crucial to address the basics. A « clunk » or « knock » from the suspension when driving over bumps is a clear signal of a problem, but it’s often dismissed as a minor annoyance. This is a dangerous mistake. While the sound could indicate a failing shock absorber, it can also be the death rattle of a critical component like a ball joint, sway bar link, or strut mount. Ignoring this sound can have catastrophic consequences, including the partial or complete separation of the wheel from the vehicle.
A worn shock absorber itself contributes to this danger. Its inability to control wheel movement puts immense stress on all surrounding components. As experts at Magnum Technology explain, the danger is systemic:
Worn shock absorbers are also a danger to other suspension components. They accelerate the wear of tyres, metal-rubber parts and springs.
– Magnum Technology, Operation and replacement of shock absorbers guide
Therefore, the first step in any suspension diagnosis is to distinguish between a benign noise and a safety-critical failure. This requires a systematic physical inspection. A « Suspension Fault » light might be on, but if there’s also a loud mechanical clunk, the electronic issue is secondary to the immediate mechanical danger. Isolating the source of the noise is paramount, and it’s a process that can be started even before the car goes on a lift.
Your 5-Step Suspension Noise Audit
- Static Bounce Test: Go to each corner of the vehicle and push down firmly on the fender. A healthy shock should rebound once and settle. If the corner continues to bounce, the shock’s damping capability is gone. Note if this action reproduces the « clunk. »
- Noise Characterization: Drive the vehicle at low speed over various bumps. Is the noise a sharp, metallic ‘clank’ (suggesting metal-on-metal contact like a bad ball joint) or a dull, muffled ‘thud’ (more typical of a worn bushing or shock)?
- Steering & Speed Test: In a safe, open area, listen for noise while turning the steering wheel back and forth. Does the noise occur during turns, or only on bumps? Also listen for a rhythmic ‘womp-womp’ sound that changes with speed, which points directly to a failing wheel bearing.
- Visual Component Check: With the wheels turned, use a flashlight to inspect the shock absorber body for any signs of heavy oil leakage. Check all visible rubber bushings for cracks or deterioration and look for any obviously loose or broken parts.
- Scan Tool Cross-Reference: Only after the physical checks, connect a diagnostic scanner. Compare any fault codes (e.g., « damper circuit open ») with your physical findings. A fault code with no audible clunk points to an electrical issue; a loud clunk with a fault code means you likely have both a mechanical and an electrical problem.
This audit process helps you perform an initial triage. If you identify a sharp metallic noise or excessive bouncing (Step 1 or 2), the vehicle may not be safe to drive and should be inspected by a professional immediately. If the checks point towards a dull thud or purely electronic codes, you can proceed with the more detailed electronic diagnosis.
Key Takeaways
- Electrical failures (connectors, wires) are far more common in modern adaptive suspensions than mechanical leaks. Always diagnose the wiring first.
- System calibration is not optional. Replacing suspension components without electronically calibrating ride height sensors will lead to an unlevel stance and other issues.
- A diagnostic-first approach, systematically isolating the true point of failure, is the key to avoiding thousands of dollars in unnecessary parts replacement.
When to Calibrate ADAS: Is It Necessary After a Wheel Alignment?
The interconnectedness of modern vehicles means a simple suspension repair or wheel alignment is no longer an isolated event. It has a direct impact on the car’s Advanced Driver-Assistance Systems (ADAS), such as lane-keeping assist, adaptive cruise control, and automatic emergency braking. The question is no longer *if* these systems are affected, but *when* recalibration is necessary. The definitive answer is: ADAS calibration is mandatory after any change to the vehicle’s ride height or wheel alignment.
Think of the ADAS camera mounted at the top of the windshield as the vehicle’s eyes. Its perception of the world is based on the assumption that the vehicle is perfectly level and pointing straight ahead, as defined by the suspension and alignment. When you perform a wheel alignment, you are changing the vehicle’s thrust angle—the direction the car travels when the steering wheel is centered. Even a tiny change of a fraction of a degree, while imperceptible to the driver, is a significant shift for the camera’s precise calculations. It might now think the lane is slightly to the left or right of where it actually is. The same principle applies to ride height changes from suspension work; altering the vehicle’s rake (front-to-back angle) changes the camera’s viewing angle of the road ahead. Ignoring calibration can lead to erratic behavior, such as the lane-keeping system pulling to one side, or worse, a delayed or false activation of the emergency braking system.
The cost of this calibration, which can range from $125 to $250 (converted from £100-£200), is often seen as an unnecessary upsell by customers. However, it is an essential final step to ensure the safety systems function as designed. The correct, non-negotiable sequence of operations is critical:
- Complete all mechanical suspension repairs.
- Set and/or calibrate the vehicle’s ride height electronically.
- Perform a complete four-wheel alignment to OEM specifications.
- Only then, calibrate all relevant ADAS sensors (camera, radar, etc.).
- Verify all systems with a test drive and final scan.
Attempting to do this out of order, such as calibrating ADAS before an alignment, is a complete waste of time and money, as the alignment will invalidate the camera calibration. Insisting on this proper sequence is a mark of a professional shop and is essential for vehicle safety.
Why Your Lane Keep Assist Pulls to the Right After Windshield Replacement?
One of the most confusing diagnostic scenarios for vehicle owners and technicians alike is when a repair in one area creates a symptom in a seemingly unrelated system. A prime example is a car developing a persistent pull to one side from the lane-keeping assist immediately after a windshield replacement. The driver feels the steering wheel tugging, assumes the alignment is off, and takes it to a shop. The alignment is checked and found to be perfect, yet the problem persists. The infuriating cause is often not in the steering or alignment at all, but is an amplified symptom of an underlying, subtle suspension issue.
After a windshield replacement, the forward-facing ADAS camera must be recalibrated. This process tells the camera where « straight ahead » is. If the calibration is done correctly, the camera will be perfectly aimed relative to the vehicle’s centerline. But what if the vehicle’s chassis itself isn’t perfectly level? Imagine a car has a very slight suspension imbalance—perhaps one corner is sitting just 5-10mm lower than the others due to a slightly off ride-height sensor. This subtle lean might be unnoticeable to the driver. However, when the freshly calibrated, perfectly-aimed camera tries to keep the car in the center of the lane, it is now fighting the chassis’s natural tendency to drift due to the lean. The lane-keep system tugs the wheel to counteract the lean, creating the pulling sensation for the driver.
This exact and counter-intuitive scenario was documented in a case study involving a vehicle post-windshield replacement. The ADAS calibration wasn’t faulty; it was so accurate that it exposed the pre-existing, hidden suspension problem. The solution had nothing to do with the windshield or the camera. The technician had to go back, diagnose the suspension, find and fix the ride-height sensor issue to level the chassis, and *then* re-calibrate the ADAS camera for a final time. The pull vanished.
This demonstrates the deepest level of system-level calibration. Every system—suspension height, wheel alignment, and ADAS perception—must be in perfect harmony. A fault in the foundational suspension system will inevitably manifest as a strange symptom in the more advanced systems layered on top. This is why a technician must think holistically, understanding that the steering wheel’s behavior might be dictated by a sensor at the rear axle, as seen through the « eye » in the windshield.
Now equipped with this diagnostic knowledge, your next step is to approach your mechanic not with a blank check, but with a series of targeted questions. Take control of the repair process by insisting on a diagnostic-first approach, and ensure you only pay for what’s truly broken.