In summary:
- A diagnostic code (like P0420) is a symptom, not the final diagnosis. It’s the starting point for your investigation.
- Understanding live data from your scanner, such as fuel trims and O2 sensor voltage, is the key to finding the true root cause.
- Simple, often overlooked issues like a weak battery, corroded terminals, or a small vacuum leak can trigger misleading and expensive-looking trouble codes.
- Knowing how to properly use your scanner and what data to look for empowers you to have intelligent conversations with mechanics and avoid unnecessary repairs.
The sudden appearance of the Check Engine Light on your dashboard can trigger a familiar wave of anxiety. Your first instinct, like most car owners, is to plug in your new, affordable OBD2 scanner, pull the code, and rush to Google. Often, you’re met with a terrifyingly simple answer: « Code P0420 means your catalytic converter has failed. Prepare for a $1,500 repair bill. » This is where most DIY diagnostic journeys end in frustration and an expensive, often unnecessary, trip to the shop.
But what if that code wasn’t a final verdict? What if it was just the first clue in a solvable mystery? The common advice to just read the code and replace the suggested part is a fundamental misunderstanding of how modern cars work. It’s the equivalent of a doctor diagnosing a disease based on a single symptom like a cough. The real power of your OBD2 scanner isn’t in reading the code; it’s in using the live data to understand the *story* your car is trying to tell you.
This guide breaks from the simplistic « code = part » fallacy. We will adopt the mindset of a diagnostic detective. Instead of panicking, you’ll learn the logic to investigate the ‘why’ behind the ‘what’. This article will teach you to interpret the clues your car is giving you, from understanding the different types of codes to using advanced data like fuel trims to pinpoint the exact source of a problem. You’ll learn how a simple, weak battery can masquerade as a catastrophic transmission failure and why clearing a code is only the first step in a proper repair.
This article provides a structured approach to empower you with genuine diagnostic skills. Follow the sections below to transform your OBD2 scanner from a box of codes into a powerful tool for self-reliance and significant savings.
Summary: Decode Your Check Engine Light Like a Pro
- Pending vs. Stored Codes: Which Ones Turn on the Check Engine Light?
- Bluetooth vs. Handheld Scanners: Which Is Better for ABS and Airbag Codes?
- How to Use Fuel Trim Data to Diagnose a Vacuum Leak?
- The Low Battery Voltage Mistake That Triggers False Transmission Codes
- When to Check Readiness Monitors: The Drive Cycle required after Code Clearing?
- How to Recover a « Bricked » ECU After a Failed Update Attempt?
- Why a Lazy O2 Sensor Costs You $200 a Year in Wasted Fuel?
- How to Spot a Fake « Specialist » Before They Dismantle Your Car?
Pending vs. Stored Codes: Which Ones Turn on the Check Engine Light?
Your OBD2 scanner isn’t just a « yes or no » tool; it communicates with nuance. The first step in your diagnostic journey is understanding the difference between a « pending » code and a « stored » code. A pending code (sometimes called a maturing code) is a one-time event. The car’s computer, the ECU, has detected a potential issue on a single trip, but it’s not yet convinced it’s a persistent problem. This code will not illuminate the Check Engine Light (CEL). Think of it as your car saying, « I thought I saw something weird, I’m keeping an eye on it. »
A stored code is a confirmed fault. The ECU has seen the same problem occur on consecutive trips or monitoring cycles, confirming it’s not a fluke. It is at this point that the dreaded Check Engine Light is activated. The system is now certain there’s an issue that requires attention. According to diagnostic system analysis, pending codes act as an early warning system, requiring multiple verified failures before they escalate to a stored code and trigger the CEL.
Understanding this distinction allows you to prioritize. A pending code might be a one-off anomaly caused by a loose gas cap or a change in fuel quality. A stored code, however, signals a real, repeatable problem. Here’s a simple framework for how to react:
- Stored Code + CEL ON: Critical priority. This is an active, confirmed problem. Address it immediately to prevent potential damage to other components.
- Stored Code + CEL OFF: High priority. The issue was confirmed but may be intermittent. The light is off now, but the problem will likely return. Investigate within the week.
- Pending Code: Medium priority. Don’t panic. Clear the code, make sure your gas cap is tight, and monitor the vehicle. See if the code returns over the next few drive cycles.
- No Code but Recent CEL: Low priority. The system may have detected a temporary fault that has since resolved itself. Use your scanner to check readiness monitors to be sure.
This tiered approach turns a confusing list of codes into a clear action plan, moving you from reacting with panic to responding with a logical strategy.
Bluetooth vs. Handheld Scanners: Which Is Better for ABS and Airbag Codes?
Not all OBD2 scanners are created equal. When you first bought your scanner, you likely chose between a small Bluetooth « dongle » that pairs with your phone and a more traditional all-in-one handheld unit. The choice has significant implications, especially when you need to diagnose systems beyond the engine. Basic, sub-$30 scanners (both Bluetooth and handheld) can typically only read and clear generic powertrain codes—the « P » codes related to engine and emissions performance.
However, modern vehicles have dozens of other computer modules. The most common ones you’ll want to access are for the Anti-lock Braking System (ABS) and the Supplemental Restraint System (SRS), which controls your airbags. A standard cheap scanner will be completely blind to these systems. If your ABS or airbag light is on, a basic scanner will report « No Codes Found, » which can be dangerously misleading. To read these specific manufacturer codes (often « U, » « B, » or « C » codes), you need a more capable scanner.
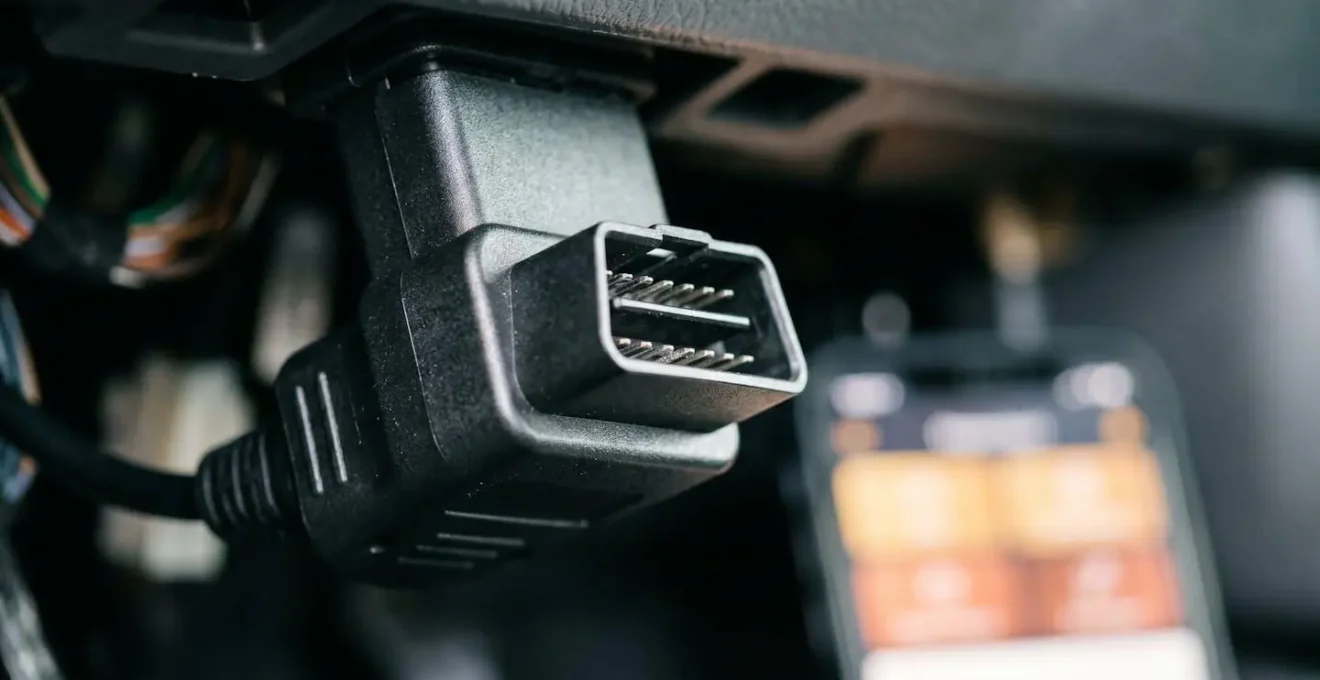
This is where the tiers of scanner capabilities become important. Generally, both Bluetooth and handheld models exist at each tier, so the choice is more about your preferred user interface—a dedicated device or your smartphone. For diagnosing ABS and SRS codes, you’ll need to invest in at least a mid-tier, or « Enthusiast, » level tool, which is a significant step up from the entry-level models.
The following table, based on a comparative analysis of OBD2 adapters, breaks down the typical capabilities you can expect at different price points.
| Capability Tier | Price Range | Systems Covered | Key Features | Best For |
|---|---|---|---|---|
| Tier 1 (Basic) | Under $30 | Engine codes only | Read/clear basic OBD2 powertrain codes | Casual users, basic diagnostics |
| Tier 2 (Enthusiast) | $50-$130 | Engine, ABS, SRS, Transmission | Full system diagnostics, service resets | DIY mechanics, multi-system diagnosis |
| Tier 3 (Prosumer) | $130-$200+ | All systems + advanced protocols | Live data graphing, bi-directional controls, DoIP support | Advanced users, professional-level diagnostics |
Ultimately, for diagnosing critical safety systems like ABS and airbags, a Tier 2 scanner is the minimum requirement. Without it, you are blind to a huge portion of your car’s electronic health.
How to Use Fuel Trim Data to Diagnose a Vacuum Leak?
This is where we transition from a code reader to a true diagnostic detective. Many engine codes, including the dreaded P0420, can be caused by the engine running too « lean » (too much air, not enough fuel). One of the most common causes of a lean condition is a vacuum leak—an unmetered air leak after the mass airflow sensor. Instead of guessing and replacing parts, you can use your scanner’s live data to prove or disprove a vacuum leak with near certainty.
The key metrics are Short-Term Fuel Trim (STFT) and Long-Term Fuel Trim (LTFT). In simple terms, these numbers show how much the ECU is adding or subtracting fuel to maintain the ideal air-fuel ratio. A positive number means the ECU is adding fuel to compensate for a lean condition. Diagnostic experts confirm that consistent STFT and LTFT values of +10% or higher at idle strongly indicate a lean condition, often caused by a vacuum leak.
A high fuel trim at idle that returns to normal (closer to 0%) at higher RPMs (around 2000 RPM) is the classic symptom of a vacuum leak. The leak is a fixed size, so its effect is significant at idle but becomes negligible when a much larger volume of air is being intentionally drawn into the engine at higher speeds. You can use this knowledge to pinpoint the exact location of the leak with a simple « smoke test » using live data.
Your Action Plan: The Live Data « Smoke Test » for Vacuum Leaks
- Connect your scan tool and navigate to live data. Select STFT (Short-Term Fuel Trim) for both Bank 1 and Bank 2 (if applicable) and display them as a graph.
- Start the engine and let it warm up to normal operating temperature so it enters « closed-loop » mode.
- With the engine at a steady idle, observe the baseline STFT value. If you have a vacuum leak, it will likely be high (e.g., +15% or more).
- Carefully and sparingly spray an unlit propane torch or brake cleaner around suspected leak areas: vacuum hoses, intake manifold gaskets, and the throttle body base.
- Watch the STFT graph on your scanner intently. When the flammable spray is sucked into the vacuum leak, it temporarily richens the mixture, and you will see the STFT value take a sudden and sharp nosedive towards negative numbers. This confirms the exact location of your leak.
By using data to find the problem, you’ve avoided replacing expensive O2 sensors or other components, and can instead perform a simple, cheap repair on a cracked hose or faulty gasket.
The Low Battery Voltage Mistake That Triggers False Transmission Codes
Sometimes the most terrifying codes are triggered by the simplest problems. Modern cars are complex networks of computers, and just like any computer, they are extremely sensitive to power supply issues. A weak, failing, or poorly connected battery can create a cascade of « ghost » codes that can send you on a wild and expensive goose chase, particularly with the transmission.
Transmission control modules (TCMs) often require a very stable voltage to operate correctly. During engine cranking, a healthy battery’s voltage shouldn’t drop too low. However, if the battery is old or has corroded terminals, the voltage can dip significantly. This dip can cause a communication breakdown between the TCM and the main engine computer (ECU). The TCM might then throw a scary-sounding code for a solenoid or pressure sensor failure, when in reality, the transmission is perfectly fine.
Before you ever authorize expensive transmission diagnostics, the very first step should be to check the health of your battery and its connections. Automotive electrical system standards specify that a healthy battery should maintain above 10.0 volts during engine cranking. A voltage dip below this threshold can easily trigger false communication and module codes across the vehicle. A real-world example illustrates this perfectly.
Case Study: The Honda Civic « Transmission Failure » That Wasn’t
A 2009 Honda Civic was brought to a shop with a P0966 code, pointing to a clutch pressure control solenoid issue. The initial diagnosis suggested a costly transmission repair or replacement. However, a sharp technician decided to check the basics first. They discovered the battery cable connections were loose and showed signs of corrosion. After thoroughly cleaning the battery terminals and securing the connections with proper post shims, they cleared the codes. The P0966 code did not return, and the transmission shifted perfectly. The « transmission problem » was nothing more than a bad electrical connection, saving the owner over a thousand dollars.
Always suspect the battery first when you see a cluster of seemingly unrelated electronic codes, especially those related to the transmission (often « P07xx » or « U » codes). A $15 battery terminal cleaning kit is a much better first step than a $150 diagnostic fee at a transmission shop.
When to Check Readiness Monitors: The Drive Cycle required after Code Clearing?
So you’ve found the problem, fixed it, and cleared the Check Engine Light. Job done, right? Not quite. Clearing the codes also resets your car’s « Readiness Monitors. » These are a series of self-tests the ECU runs to verify that all emissions-related components are functioning correctly. If you need to pass an emissions inspection, most states require the majority of these monitors to be in a « Ready » or « Complete » state. If they are « Not Ready, » you will fail the inspection, even with no Check Engine Light on.
To get the monitors to run and complete, you can’t just drive around aimlessly. The ECU requires a specific sequence of driving conditions, known as a « Drive Cycle, » to test everything from the catalyst efficiency to the EVAP system. These conditions can be tricky to meet in normal city driving. For instance, OBD-II system requirements indicate that many monitors will not run unless the fuel tank is between 15% and 85% full and the ambient temperature is moderate. Trying to complete a drive cycle with a full tank or on a very cold day will be a fruitless effort.
While every manufacturer has a slightly different specific procedure, there is a « universal » drive cycle that will satisfy the requirements for most vehicles. Following these steps after a repair is the final confirmation that your fix was successful and your vehicle is ready for inspection.
- The Cold Soak: This is the most important and most often skipped step. The vehicle must be left off for at least 8 hours, ideally overnight, so the engine temperature matches the outside air temperature.
- The Wake-Up: Start the engine and let it idle in Park for 2-3 minutes. This allows the O2 sensor heaters to activate and stabilize.
- The City Tour: Drive the vehicle at a steady speed between 25-45 mph for about 10-15 minutes, making several normal stops. This will test components like the EVAP system.
- The Highway Cruise: Get on a highway where you can maintain a steady speed between 55-60 mph for at least 5-10 minutes. This is critical for testing the catalytic converter and O2 sensors.
- The Coast-Down: While on the highway, safely release the accelerator and allow the car to coast down from 60 mph to around 40 mph without using the brakes. This tests the fuel-cut operation of the ECU.
After completing the cycle, use your scanner to check the readiness monitor status. Seeing a screen full of « Ready » monitors is the true sign of a successful DIY repair.
How to Recover a « Bricked » ECU After a Failed Update Attempt?
This section is less of a « how-to » and more of a « how-to-never-let-this-happen. » While most affordable OBD2 scanners are read-only tools, some advanced DIYers may be tempted to use more powerful devices to « flash » or update their car’s Engine Control Unit (ECU) for performance tuning or feature activation. This is an incredibly high-risk operation. If the process is interrupted for even a fraction of a second, you can « brick » the ECU, rendering it an expensive paperweight and your car an immovable object.
Recovery from a bricked ECU is almost never a DIY job. It often requires specialized bench-top tools to force a connection to the processor directly, a service that specialist shops charge hundreds of dollars for, if it’s possible at all. For the vast majority of car owners, the only « fix » is to buy a brand new ECU from the dealer, which can cost thousands of dollars when you factor in programming and installation.
Therefore, the only true « recovery » is prevention. If you must venture into the world of ECU programming, you must treat the process with the reverence of a brain surgeon. The difference between a successful flash and a catastrophic failure is all in the preparation. Adhering to a strict set of rules is non-negotiable.
- Vow 1: Always use a dedicated, high-quality battery maintainer or charger that can supply a stable 13.5-14.5 volts throughout the entire process. Never, ever rely on the car’s battery alone.
- Vow 2: Use only high-quality, manufacturer-recommended communication cables. Avoid cheap Bluetooth adapters for any programming or flashing operation; they are notoriously unreliable for this task.
- Vow 3: On your laptop or programming device, disable all sleep modes, screen savers, and automatic updates. Turn off antivirus software that could interrupt the communication process.
- Vow 4: Ensure your laptop is plugged into AC power and has a fully charged battery as a backup.
- Vow 5: Once the flashing process begins, do not touch anything. Never disconnect the cables, turn off the ignition, or close the software, even if it appears to be frozen. Some updates can take over an hour. Patience is paramount.
For 99% of DIY mechanics, the smartest move is to leave ECU flashing to the professionals with the proper equipment and insurance to cover things if they go wrong.
Why a Lazy O2 Sensor Costs You $200 a Year in Wasted Fuel?
The code P0420 (« Catalyst System Efficiency Below Threshold ») is one of the most common reasons a Check Engine Light comes on. The immediate, and often incorrect, assumption is that the catalytic converter has failed. However, a much more common culprit is a « lazy » upstream oxygen (O2) sensor. This sensor is the master controller of your engine’s air-fuel mixture, and when it gets old and slow, it not only can trigger a false P0420 code but also quietly drains your wallet at the gas pump.
A healthy upstream O2 sensor (usually labeled « Bank 1, Sensor 1 ») should react almost instantly to changes in the exhaust gas, rapidly switching its voltage output between lean (~0.1V) and rich (~0.9V). This rapid switching tells the ECU exactly how to adjust the fuel injectors for perfect combustion. An old, lazy sensor becomes slow to respond. It takes too long to switch, forcing the ECU to make slow, inaccurate fuel adjustments. This usually results in the engine running slightly rich, wasting fuel with every combustion cycle. The fuel efficiency analysis demonstrates that a lazy O2 sensor causing just a 10-15% rich condition on an average vehicle can waste approximately 48 gallons of fuel per year, costing you around $200 annually at today’s prices.
You can spot a lazy sensor using your scanner’s live data graphing feature. A healthy upstream O2 sensor’s voltage graph at idle will look like a rapid, sharp up-and-down waveform, switching every 1-2 seconds. A lazy sensor’s graph will be a slow, sluggish, rounded wave, taking 3 seconds or more to complete a cycle. This sluggish response prevents the downstream O2 sensor (which monitors the catalytic converter) from seeing the pattern it expects, leading it to mistakenly believe the converter is failing and triggering the P0420 code.
Replacing a $60 upstream O2 sensor is a far better outcome than replacing a $1,500 catalytic converter. This is a perfect example of how using live data to find the root cause saves you a huge amount of money and time.
Key Takeaways
- A diagnostic code is a symptom, not a cause. Your job as a diagnostic detective is to find the real « why » behind the code.
- Live data is your most powerful tool. Learning to read fuel trims and O2 sensor graphs tells you the true story of your engine’s health.
- Always check the basics first. A healthy, fully charged battery and clean, tight connections can prevent a world of misleading « ghost » codes.
How to Spot a Fake « Specialist » Before They Dismantle Your Car?
Now that you’re armed with a new level of diagnostic knowledge, you’re in a much stronger position when you do need to take your car to a professional. You can now tell the difference between a true diagnostic technician and a « parts-changer » who will simply follow the code to an expensive and possibly incorrect repair. The best way to vet a mechanic is to ask them a few key questions before they even touch your vehicle.
A good technician will respect your informed questions and see you as a partner in the repair process. A parts-changer or a dishonest mechanic will often become defensive, evasive, or dismissive. Their reaction to your questions is often more telling than their answers. Remember, you are hiring them for their diagnostic process, not just their ability to turn a wrench. The goal is to pay for their expertise in finding the problem, not to fund their guesswork.
The code tells you where the issue showed up, but not necessarily why it happened.
– GreatWater 360 Auto Care diagnostic team, OBD-II diagnostic fundamentals guide
Here are three killer questions to ask any mechanic before authorizing a repair, which will quickly separate the pros from the cons:
- Question 1: « What is your diagnostic plan before we start replacing parts? » This tests if they have a systematic process. A good mechanic will outline logical steps (e.g., « First, I’ll check fuel trims, then test sensor voltage, then perform a smoke test »). A parts-changer will say, « Well, the code is P0420, so we’ll start by replacing the catalytic converter. »
- Question 2: « Can you show me the data that leads you to this conclusion? » This tests for transparency. A confident technician will be happy to show you the live data on their scanner, pointing out the lazy O2 sensor waveform or the high fuel trim numbers that confirm their diagnosis. A fake specialist will give excuses or say it’s « too complicated. »
- Question 3: « What are the next cheapest and easiest things we can rule out first? » This tests for honesty and a customer-focused approach. An honest mechanic will appreciate this mindset and might suggest checking for a vacuum leak before condemning an expensive sensor. A dishonest one will push for the most expensive repair first.
Armed with this approach, you can confidently navigate car repairs, ensuring you only pay for what’s necessary and that the work is based on data-driven facts, not on expensive guesswork.