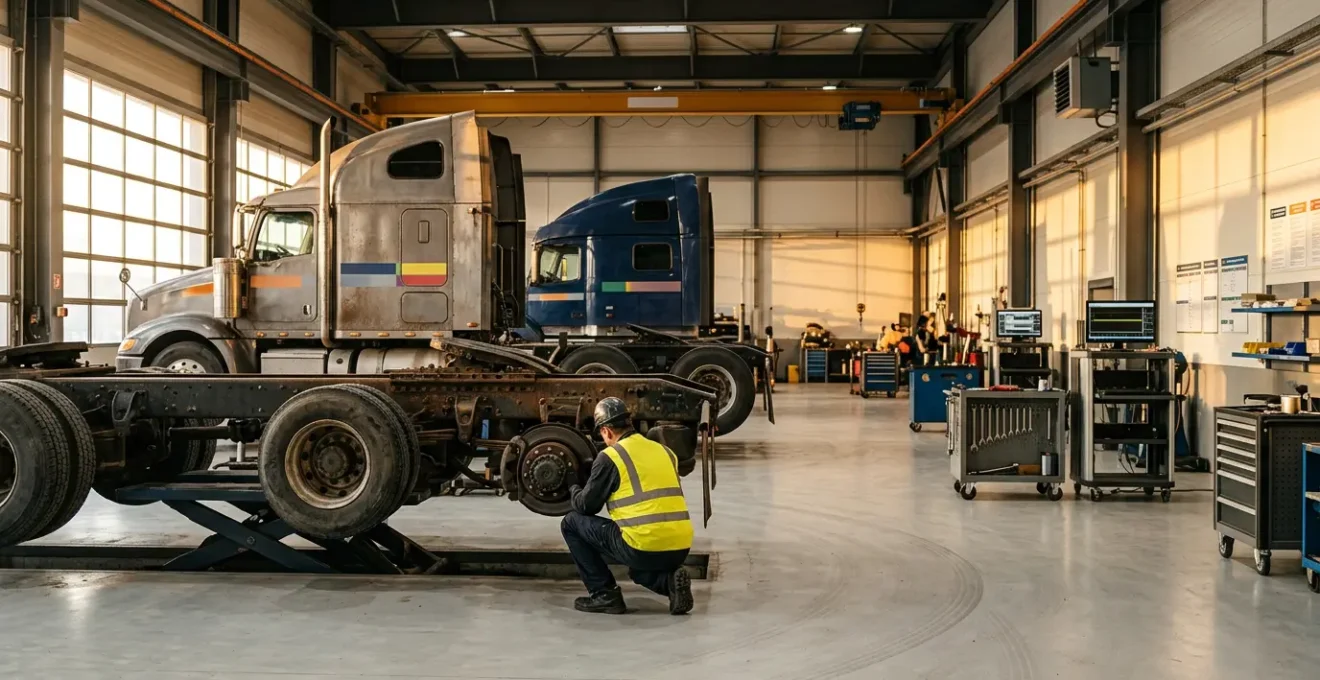
Passing a roadworthiness inspection with an aging fleet is not about achieving perfection; it’s about mastering the specific regulatory failure thresholds to distinguish between critical, non-negotiable repairs and cosmetic issues that can be safely deferred.
- Inspectors focus on abrupt changes: sharp edges on rust, play in suspension components, and cracks in brake lines under flex.
- Understanding the difference between state and federal standards, especially for items like window tint, prevents automatic failures.
- Transforming service logs into « defensible documentation » not only proves compliance but also significantly increases the vehicle’s resale value.
Recommendation: Implement a pre-inspection audit focused on structural integrity and safety system function, rather than a blanket approach to cosmetic wear and tear.
As a small business owner, the sight of a van hitting 150,000 miles brings a mix of pride and anxiety. That vehicle is a workhorse, a core asset. But it’s also a liability approaching its next roadworthiness inspection. The conventional wisdom is to start a costly cycle of repairs, replacing anything that looks worn. This often leads to overspending on issues that, from a compliance standpoint, are perfectly acceptable. Many owners sink capital into fixing minor surface rust or replacing parts that still have functional life, fearing the dreaded « Out-of-Service » sticker.
The core problem isn’t the vehicle’s age; it’s the lack of a strategic framework to differentiate between cosmetic aging and a regulatory compliance failure. The key isn’t to make your fleet look new. The true leverage comes from adopting an inspector’s mindset. It’s about understanding the specific, non-negotiable failure points that a compliance officer is trained to identify, allowing you to prioritize critical safety repairs while strategically deferring those that won’t trigger a violation. This approach conserves capital, maximizes uptime, and ensures every dollar spent directly contributes to passing the inspection.
This guide provides that framework. We will move beyond generic checklists to explore the specific thresholds for common high-mileage issues, from rust and suspension play to brake lines and service documentation. You will learn how to conduct targeted self-inspections that mirror the official process, enabling you to build a cost-effective maintenance strategy that guarantees compliance and protects your bottom line.
To help you navigate these critical compliance points, this article details the specific areas where inspectors focus their attention. The following sections break down exactly what you need to know to prepare your high-mileage fleet effectively.
Summary: A Strategic Guide to High-Mileage Fleet Inspections
- Why Surface Rust Won’t Fail You, But Sharp Edges Will?
- How to Check Ball Joints for Play Without a Lift?
- State vs. Federal Standards: Which Inspection Criteria Apply to Your Truck?
- The Window Tint Mistake That Guarantees an Inspection Failure
- When to Replace Brake Lines: The Visual Sign Inspectors Look For First
- Surface Rust vs. Structural Rot: What Will Fail Your Inspection?
- ASE vs. Manufacturer Certified: Which Credential Matters for Your Brand?
- How to Build a « Full Service History » That Increases Resale Value by 20%?
Why Surface Rust Won’t Fail You, But Sharp Edges Will?
One of the most common anxieties for owners of high-mileage vehicles is rust. However, not all rust is a compliance failure. Inspectors are trained to differentiate between cosmetic surface rust and corrosion that compromises safety. A light orange haze on frame rails or body panels is typically noted but rarely a reason for failure on its own. The failure threshold is crossed when rust creates a specific hazard. This includes perforation through a structural component or, more commonly, creating sharp, jagged edges that could snag clothing or injure a person. An inspector will often run a gloved hand over a rusted area; if it snags, it’s a failure.
The financial incentive to understand this distinction is significant. Taking a vehicle out of service for an unnecessary rust repair can be incredibly costly. The expense of a vehicle being off the road is estimated to be between $448 to $760 per vehicle per day, a figure that highlights the importance of only performing critical repairs before an inspection. By adopting a triage system, you can classify rust into three levels: Level 1 (cosmetic surface rust to be monitored), Level 2 (scaling or bubbling to be scheduled for low-cost treatment), and Level 3 (perforation or sharp edges requiring immediate repair). This approach focuses resources where they are needed to pass inspection, representing a strategic deferral of non-critical cosmetic work.
Focusing on the « glove test » failure point—the presence of sharp edges—is a far more cost-effective strategy than attempting to eliminate all visible rust. Grinding down a sharp edge to make it smooth is a fast, inexpensive fix, whereas treating all surface rust is a major undertaking. This is the essence of thinking like an inspector: addressing the specific violation, not just the general appearance of wear.
How to Check Ball Joints for Play Without a Lift?
Suspension components are a primary focus in any roadworthiness check, and ball joints are at the top of the list. An inspector is looking for « play, » or excessive movement, which indicates wear and a potential failure. A common misconception is that you need a professional lift to diagnose this. In reality, you can perform a highly effective test with a simple floor jack. The key is to load the suspension correctly by jacking the vehicle under the lower control arm, not the frame. This keeps the suspension compressed as it would be on the road, revealing play that might otherwise be hidden.
The standard diagnostic is the « 12-and-6 / 9-and-3 » method. Once a wheel is 1-2 inches off the ground, grip it firmly at the top and bottom (12 and 6 o’clock positions). Attempt to rock it in and out. Any visible movement or clunking sound from the ball joint area itself is a clear indicator of wear and a guaranteed inspection failure. Next, move your hands to the sides (9 and 3 o’clock) and push/pull. If the tire moves but the steering wheel doesn’t, the issue is likely a worn tie rod end, another common failure item. Finally, always perform a visual check of the rubber dust boots; a torn or leaking boot means contaminants have entered the joint, and it should be replaced even if it passes the play test.
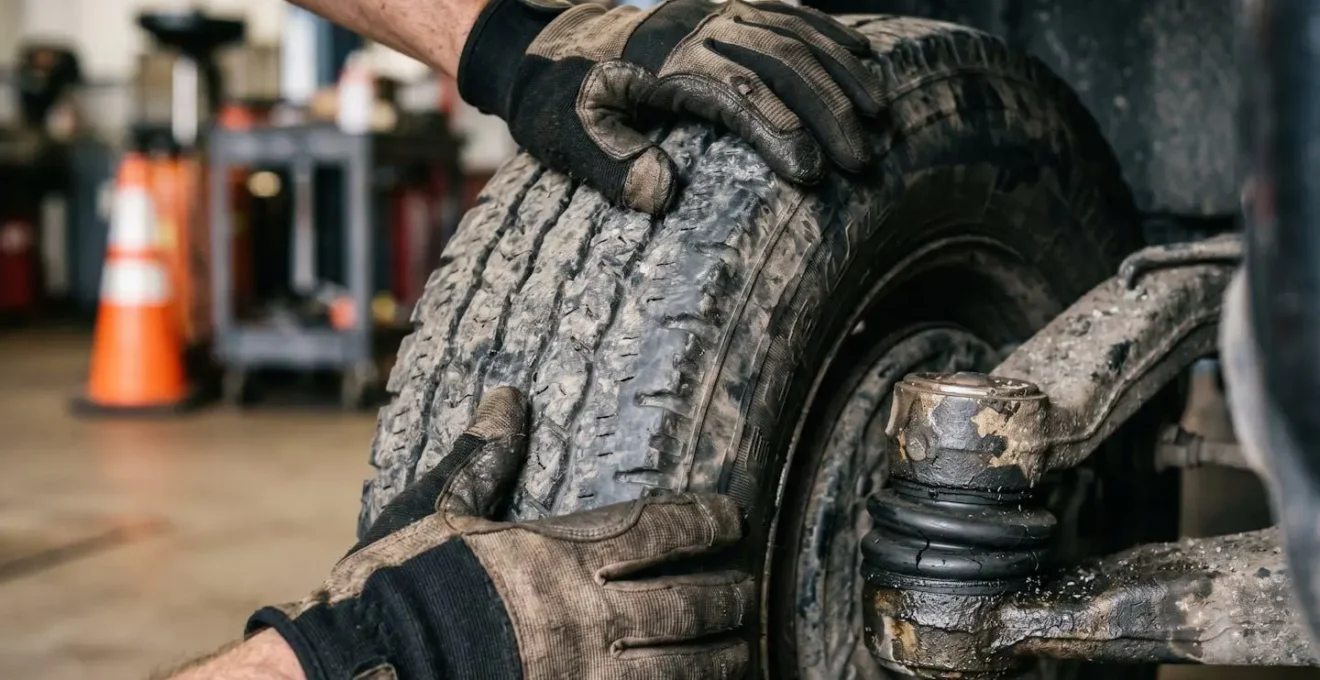
This hands-on check is precisely what an inspector does. Learning to perform it yourself allows you to identify failing components proactively. There is no acceptable tolerance for play in a ball joint; from a regulatory standpoint, any perceptible movement constitutes a failure. By finding and replacing a worn ball joint before the official inspection, you prevent a certain out-of-service violation and a potentially dangerous on-road failure.
State vs. Federal Standards: Which Inspection Criteria Apply to Your Truck?
Navigating the web of regulations is a major challenge for fleet owners. It’s crucial to understand that your vehicles are subject to both federal and state inspection standards, and they are not always the same. The Federal Motor Carrier Safety Administration (FMCSA) sets the baseline requirements for commercial vehicles in Part 396 of its regulations. These are the minimum standards that apply nationwide. However, individual states have the authority to impose stricter or additional requirements. For your fleet of vans, this means you must comply with the more stringent of the two rule sets. A vehicle that passes federal muster could still fail a state-level inspection.
The consequences of not knowing the specific rules are stark, with 23% of commercial vehicles placed out-of-service during the 2024 International Roadcheck inspections. Common areas where state rules are stricter include window tinting, exhaust noise levels, and tire tread depth requirements. Your first action should be to obtain the official commercial vehicle inspection manual for your state of operation. This document is the definitive guide an inspector will use. Compare its requirements to the FMCSA standards, paying close attention to any state-specific additions. This is the only way to build a truly compliant pre-inspection checklist.
Case Study: MacDonald Bus Ltd’s Strategic Inspection Frequency
A practical example of strategic compliance comes from MacDonald Bus Ltd in Edinburgh. Operating a mixed-age fleet of 152 buses, they implemented a dual-frequency inspection system. Older buses (over 6 years) were kept on a strict 28-day inspection schedule, while the schedule for newer buses (under 6 years) was extended to 42 days. After a year of monitoring showed no adverse effects on roadworthiness, this strategy reduced their annual inspections by 300. This freed up significant maintenance resources while maintaining full regulatory compliance by tailoring the maintenance intensity to the vehicle’s age and risk profile.
This case illustrates a sophisticated approach. While a small business may not have 152 vehicles, the principle applies: you can create a tiered maintenance plan. Your higher-mileage vans might get a full pre-inspection check every quarter, while newer ones get a less intensive review. This focuses resources where the risk is highest, ensuring compliance without unnecessary cost.
The Window Tint Mistake That Guarantees an Inspection Failure
Among the easiest and most frustrating ways to fail a roadworthiness inspection is a window tint violation. Unlike mechanical issues that involve degrees of wear, tint regulations are typically absolute and leave no room for interpretation. For commercial vehicles, the most critical rule almost universally involves the windshield. All windshields have a small marking etched into the glass near the top edge, known as the « AS1 » line. Federal regulations are explicit: no tint or other material is permitted on the windshield below this line.
An inspector will check for this immediately. Any film, no matter how light, that extends below the AS1 line is an automatic failure. This is a common mistake on vehicles that have had aftermarket tint applied. Furthermore, even legally placed tint can be a violation if it’s in poor condition. Film that is bubbling, peeling, or scratched in a way that obstructs the driver’s clear view of the road will also result in a failure. Finally, the tint cannot cover any required decals, stickers, or the Vehicle Identification Number (VIN) plate visible through the dashboard.
For side windows, the rules vary by state but are based on a « Visible Light Transmission » (VLT) percentage. Most states require the front side windows to allow at least 70% of light to pass through. This means the tint itself cannot be darker than 30%. It’s your responsibility to know your state’s specific VLT requirement. A pre-inspection checklist for your fleet must include a specific item to verify tint compliance on every vehicle. It’s a simple visual check that can prevent a costly and time-consuming failure for an issue that has nothing to do with the vehicle’s mechanical safety.
When to Replace Brake Lines: The Visual Sign Inspectors Look For First
If there is one system that receives the most scrutiny during an inspection, it is the brakes. It’s the area where a failure has the most catastrophic potential. In fact, data consistently shows that defective service brakes accounted for 25% of out-of-service violations, making them the leading cause of commercial vehicle failures. While components like pads and rotors are obvious wear items, inspectors often focus first on the brake lines and hoses, as their failure can lead to a total loss of braking power.
The number one visual sign an inspector looks for is chafing. This is where a brake line—whether a flexible rubber hose or a rigid steel line—is rubbing against a frame rail, suspension component, or another line. Any visible abrasion or wear mark from this contact is considered an imminent failure risk and is grounds for an immediate out-of-service order. Inspectors will also physically flex the rubber hoses, looking for cracks that only appear under stress, which indicate the rubber has become dry and brittle. This « flex-and-check » technique reveals degradation that isn’t apparent when the hose is static.
For steel brake lines, the distinction between surface rust and structural corrosion is critical. Light, uniform surface rust is generally acceptable. However, an inspector will fail a line that shows heavy pitting, swelling (especially near fittings), or flaking that indicates a loss of wall thickness. They may even use a screwdriver to gently probe a suspect area to test its integrity. If the tool can create a deeper hole or the metal feels soft, the line has failed. Proactively inspecting for and replacing any line that is chafing is one of the single most effective actions you can take to ensure your fleet passes inspection.
Key Takeaways
- The primary goal of a pre-inspection audit is to identify issues that cross a specific regulatory failure threshold, not to address all cosmetic wear.
- Hands-on diagnostic tests for components like ball joints can be performed effectively without a professional lift, empowering owners to find critical faults.
- A « defensible » digital service history detailing the « why » behind each repair proves compliance and can increase a vehicle’s resale value by demonstrating meticulous care.
Surface Rust vs. Structural Rot: What Will Fail Your Inspection?
While we’ve established that cosmetic surface rust isn’t a primary failure point, the conversation changes entirely when that rust evolves into structural rot, especially on the vehicle’s frame. The frame is the backbone of your van; its integrity is non-negotiable. Inspectors are trained to use specific methods to test whether rust has compromised this structure. Understanding these tests allows you to see your vehicle’s frame through their eyes and identify a critical failure before they do. This is a level beyond the « sharp edge » test for body panels; this is about the load-bearing capacity of the vehicle.
The two most common field tests are the screwdriver penetration test and the ball-peen hammer sound test. For the first, an inspector will take a flathead screwdriver and press its tip firmly into a heavily rusted area of the frame. If the metal is sound, the screwdriver won’t go anywhere. If it penetrates the metal or pushes a chunk out, the frame’s integrity is compromised, and the vehicle will be placed out-of-service. The hammer test is auditory: tapping a solid frame rail produces a sharp, clear « ping. » Tapping a rotted section produces a dull « thud » as the corroded, layered metal absorbs the impact. This sound difference is a definitive sign of internal decay.
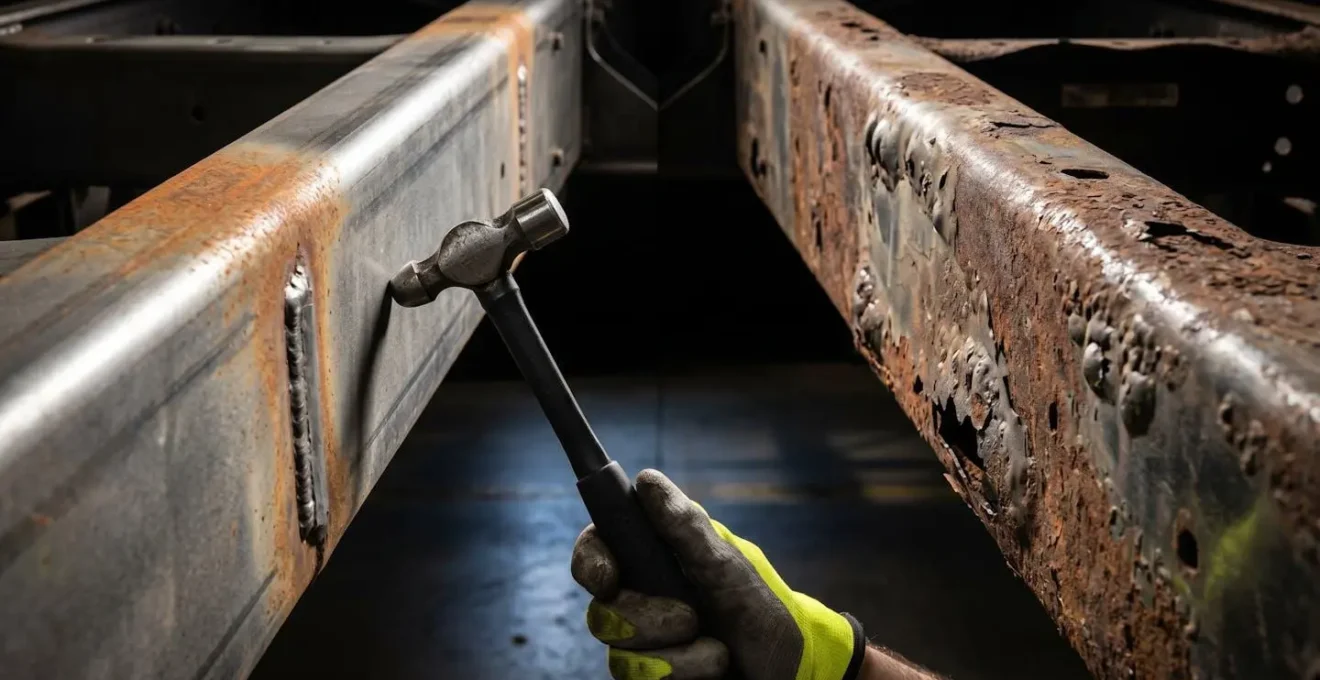
Inspectors will pay special attention to critical zones on the frame, such as suspension mounting points, spring hangers, and engine crossmembers. Rust in these high-stress areas receives far more scrutiny. Another red flag is delamination, where the metal appears to be swelling or flaking off in layers. This indicates that rust is spreading between the layers of steel, destroying its strength from the inside out. This is always considered structural rot, not cosmetic rust, and will fail an inspection every time.
Action Plan: Frame Integrity Audit
- Critical Zone Mapping: With the vehicle parked, identify and visually inspect high-stress frame areas: all suspension mounting points, engine crossmember, and any trailer hitch mounting points.
- Hammer Sound Test: Using a small ball-peen hammer, lightly tap the frame rails in several locations, especially near the critical zones identified in step 1. Listen for a consistent, clear « ping. » Note any areas that produce a dull « thud. »
- Screwdriver Probe: In any areas that produced a « thud » or show heavy, flaking rust, press the tip of a flathead screwdriver firmly into the surface. If the metal feels soft or the screwdriver starts to penetrate, mark this area for immediate professional assessment.
- Delamination Check: Look closely at the entire frame for any signs of swelling, bubbling, or metal separating into thin layers. Pay extra attention to the areas around welds and bolts.
- Documentation: Take clear, well-lit photos of any areas of concern identified during the audit to share with your certified technician for a repair estimate.
ASE vs. Manufacturer Certified: Which Credential Matters for Your Brand?
Ensuring your high-mileage fleet is maintained by qualified technicians is a requirement under FMCSA Part 396. But for a small business owner, deciding what « qualified » means can be confusing. The two primary credentials you’ll encounter are ASE (Automotive Service Excellence) certifications and Manufacturer-specific certifications (e.g., Ford, Cummins, Detroit Diesel). Choosing the right technician or service center is a strategic decision that impacts cost, repair quality, and warranty compliance. Neither is inherently « better »; their value depends entirely on your fleet’s composition and age.
ASE T-Series certifications for Medium/Heavy trucks are broad-based. A technician with these credentials has demonstrated competency across a wide range of systems and manufacturers. This is extremely valuable for a mixed fleet with vehicles from different brands (like Ford, Ram, and Freightliner). It’s a cost-effective approach, as one highly-skilled ASE-certified tech can competently handle routine maintenance and diagnostics on your entire fleet. The downside is that ASE certification alone is not typically sufficient to perform warranty-reimbursed repairs, as OEMs require their own specific training.
Manufacturer certifications, on the other hand, are highly specialized. A Ford-certified technician is an expert on Ford vehicles, with access to proprietary diagnostic tools and procedures. This is essential if a large portion of your fleet is still under warranty, as using a manufacturer-certified shop is the only way to have repairs covered. For a single-brand fleet, this approach ensures the highest level of expertise. The drawback is the lack of versatility; a Cummins-certified engine specialist may not be the best choice for a transmission issue on a GM van. For most small businesses with aging, mixed-brand fleets, a hybrid strategy is often best: using a trusted independent shop with strong ASE-certified technicians for general maintenance, and a dealership only for specific, complex brand-related issues or warranty work.
This table outlines the strategic considerations for choosing between credential types.
| Credential Type | Best Use Case | Cost Efficiency | Warranty Work Authorization | Multi-Brand Capability |
|---|---|---|---|---|
| ASE T-Series (Medium/Heavy Truck) | Mixed-brand fleets (Ford, Hino, Freightliner, etc.) | High – Single certification covers multiple manufacturers | Not typically accepted for OEM warranty reimbursement | Excellent – Demonstrates broad competency across all commercial vehicle systems |
| Manufacturer Certification (e.g., Cummins, Detroit Diesel) | Large percentage of fleet under active warranty or single-brand operation | Lower – Requires separate certification per brand | Required for in-house warranty-reimbursed repairs | Limited – Brand-specific diagnostics and procedures only |
| Hybrid Team Strategy (Recommended) | Diverse fleet with some warranty-period vehicles | Optimized – 80% ASE technicians + 20% brand specialists | Partial – Brand specialists handle warranty claims | Maximized – Covers routine maintenance (ASE) and complex brand-specific diagnostics (OEM certified) |
How to Build a ‘Full Service History’ That Increases Resale Value by 20%?
The generic advice to « keep good records » is one of the most common platitudes in fleet management. A shoebox full of greasy receipts is technically a record, but it does little to prove compliance or build value. The goal is to elevate your maintenance logs from a simple file into what can be called « defensible documentation. » This is a service history so detailed, credible, and transparent that it not only satisfies a DOT inspector but also gives a future buyer the confidence to pay a premium for your vehicle. As noted by independent insurance agency fleet management guidance, « keeping records organized can help preserve value over time. »
The first step is to go digital. Transitioning from paper to a fleet management software or even a detailed spreadsheet is crucial. A digital log automatically captures date, mileage, and technician details in a clean, searchable format. The second, more important step is to document the « why, » not just the « what. » An entry that says « Replaced alternator » is weak. A defensible entry reads: « Replaced alternator at 150,000 miles as a proactive measure in line with our preventive maintenance program. Installed OEM-spec Delco part #12345. Work performed by ASE-certified Tech #47. » This narrative demonstrates proactive, professional management.
To truly maximize value, expand your documentation beyond mechanical repairs. Log every wheel alignment, including the before-and-after spec sheets to prove you protected the tires and suspension. Keep digital copies of daily driver vehicle inspection reports (DVIRs) to show diligence. Even log the dates of exterior washes and detailing to demonstrate pride in the asset’s condition. The most advanced systems use mobile apps that require technicians to take time-stamped photos of the old part, the new part being installed, and the completed repair. This verifiable visual evidence is the gold standard of defensible documentation and can easily justify a higher resale price, as it removes nearly all doubt for a potential buyer about the vehicle’s history and care.
By implementing these targeted inspection and documentation strategies, you shift from a reactive, costly maintenance cycle to a proactive, data-driven compliance program. This not only ensures you pass roadworthiness checks consistently but also transforms your maintenance budget from a pure expense into an investment that preserves and even enhances the value of your fleet assets.