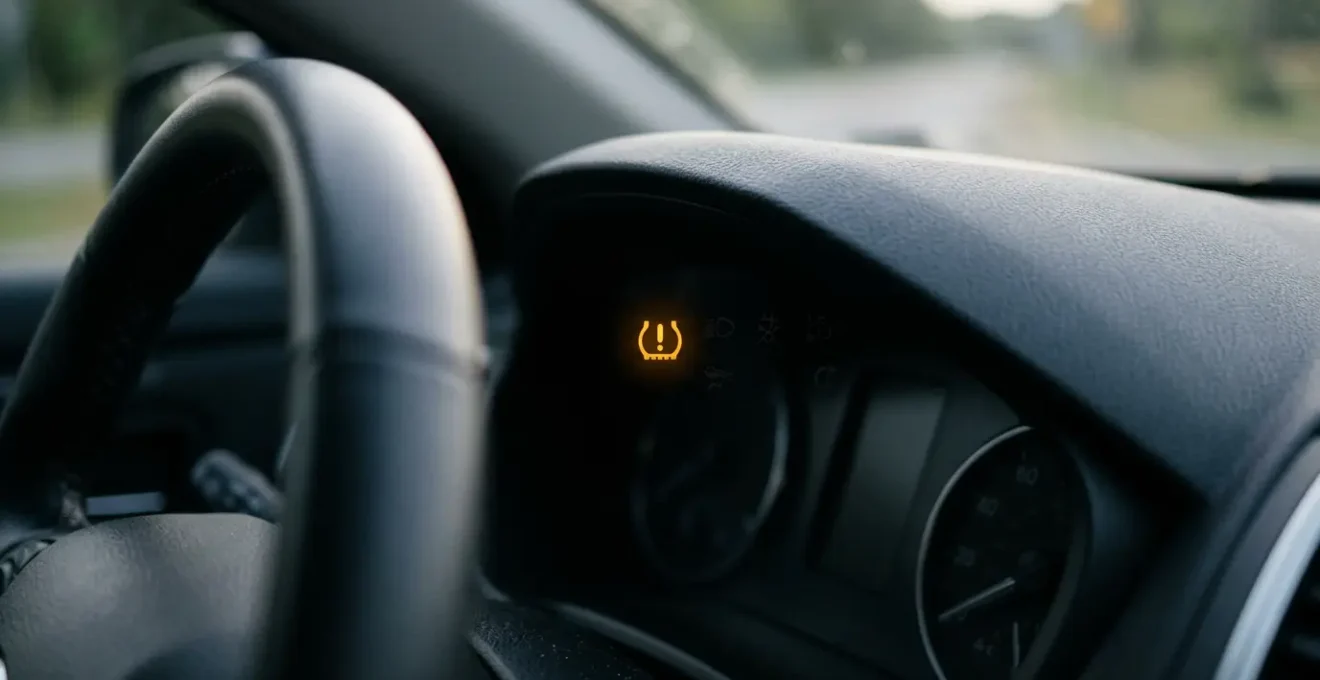
That stubborn TPMS light on your dash, even when your tires look perfectly fine, is a common source of anxiety for drivers. It’s not a glitch; it’s a messenger. This guide demystifies the signals your car is sending, explaining everything from the simple physics of temperature change to hidden issues like sensor corrosion and battery failure. By understanding the « why » behind the warning, you can move from confusion to control, correctly diagnosing the problem and ensuring your vehicle’s safety.
The amber glow of the Tire Pressure Monitoring System (TPMS) light is a familiar sight for many drivers. You pull over, kick the tires—they look fine. You might even check them with a gauge, and the pressure seems right. Yet, the light persists, creating a nagging sense of uncertainty. Is it a real danger? A simple glitch? This feeling of being in the dark is frustrating, especially when you’ve done the right thing by checking your tires.
Most advice you’ll find is generic: « check the pressure » or « it’s probably the cold weather. » While sometimes true, this barely scratches the surface. The reality is that your TPMS is a sophisticated system, and the warning light is its way of communicating. Ignoring it or simply resetting it without understanding the cause can mask serious safety issues. The key isn’t just to make the light go away; it’s to understand the specific language it’s speaking.
But what if the real problem isn’t the tire pressure itself, but the intricate hardware designed to measure it? The solution lies not in generic tips, but in a deeper understanding of the engineering at play. This guide moves beyond the basics to reveal the hidden causes of a persistent TPMS light. We will explore the physics of air pressure, the different types of TPMS and their vulnerabilities, and the surprising mechanical failures that have nothing to do with a simple puncture.
By the end of this article, you will be able to interpret the TPMS signals like a technician, identifying the difference between a minor fluctuation and a genuine system malfunction. You’ll learn how to perform basic resets, prevent costly damage from simple mistakes, and know exactly when it’s time to see a professional, transforming you from a worried driver into an informed vehicle owner.
This comprehensive guide will walk you through the most common and overlooked reasons for a persistent TPMS light. The following sections break down each potential cause, providing you with the knowledge to diagnose and address the issue with confidence.
Table of Contents: Why Your TPMS Light Is On Despite Your Tires Looking Full?
- Why Your Tire Pressure Drops 1 PSI for Every 10°F Drop in Temperature?
- How to Reset Your TPMS Sensors Without a Dealer Scan Tool?
- Direct vs. Indirect TPMS: Which System Is More Prone to False Alarms?
- The Valve Stem Cap Mistake That Seizes Your $80 TPMS Sensor
- When to Replace TPMS Sensors: The Age Limit Most Shops Won’t Tell You
- The Tire Sidewall Mistake That Leads to Cracked Rims on Highway Impacts
- How to Check Tire Tread Depth Using a Coin vs. a Gauge?
- How to Check Tire Tread Depth Using a Coin vs. a Gauge?
Why Your Tire Pressure Drops 1 PSI for Every 10°F Drop in Temperature?
The most common reason your TPMS light appears on a chilly morning is pure physics. Your tires aren’t necessarily losing air; the air inside is simply becoming denser. As the ambient temperature drops, the air molecules inside your tire slow down and move closer together, a process known as molecular contraction. This reduces the pressure they exert on the tire’s inner walls. Automotive research confirms a reliable rule of thumb: for every 10°F (or roughly 5.6°C) drop in temperature, your tire pressure will decrease by approximately 1 PSI (Pounds per Square Inch).
Imagine your tires were correctly inflated to 35 PSI on a warm 70°F afternoon. If the temperature plummets to 30°F overnight, you can expect to lose about 4 PSI, bringing your tire pressure down to 31 PSI. This is often enough to trigger the warning light. Most TPMS systems are designed to alert the driver when the pressure in one or more tires falls 25% below the manufacturer’s recommended cold inflation pressure. So, if your recommended pressure is 35 PSI, a warning could be triggered at or below 26.25 PSI, but a significant drop can bring you close enough to that threshold to cause an alert.
The light often turns off by itself after several minutes of driving. This isn’t magic; it’s physics working in reverse. The friction between your tires and the road, along with the heat from your brakes, warms the air inside the tires. As the air heats up, the molecules expand, and the pressure increases, often rising back above the TPMS warning threshold. However, this doesn’t mean you should ignore the light. It’s a clear signal that your tire pressure was, at one point, dangerously low for cold conditions, impacting your vehicle’s handling, fuel efficiency, and braking performance. The correct response is to check and adjust the pressure when the tires are « cold » – meaning they haven’t been driven for at least three hours.
How to Reset Your TPMS Sensors Without a Dealer Scan Tool?
So, you’ve checked your tires, corrected the pressure, but the TPMS light is still glaring at you. Before you book a costly trip to the dealership, it’s important to know that many vehicles have a built-in procedure for recalibrating the TPMS. This process tells the system that you’ve acknowledged the warning and that the current pressure levels are the new baseline to monitor. The method varies significantly by manufacturer, so consulting your owner’s manual is always the first step. However, most DIY resets fall into a few common categories.
Many modern vehicles, especially from brands like Honda or Toyota, feature a dedicated TPMS reset button. This is often a small, sometimes unmarked, button located on the lower dash near the steering column, inside the glove box, or even on the center console. The process usually involves turning the ignition to the « ON » position (without starting the engine), pressing and holding the TPMS button until the light blinks, and then driving the vehicle for 20-30 minutes to allow the system to recalibrate.

Other vehicles, particularly newer models with advanced infotainment systems, have moved the reset function into a digital menu. You’ll typically navigate through « Vehicle Settings, » « Tire Pressure, » or a similar menu to find a « Calibrate TPMS » or « Reset » option. For some manufacturers like GM or Ford, a more complex « relearn » procedure may be required, sometimes involving a specific sequence of key fob presses, ignition cycles, or even letting air out of each tire in a specific order to « wake up » the sensors. While these methods can seem daunting, a quick search for your specific make, model, and year will often yield a step-by-step video tutorial.
Here are some common manufacturer-specific methods:
- Honda Calibration Method: Turn ignition ON, press and hold TPMS button until light blinks twice, then drive 30 minutes at 30-65 mph to complete calibration.
- GM Stationary Relearn: Turn ignition to ON/RUN, press and hold LOCK + UNLOCK on key fob until horn sounds, then trigger each sensor in order (LF → RF → RR → LR) using a TPMS tool or deflation method.
- Ford Training Mode: Inflate all tires to placard PSI, turn ignition OFF and press/release brake once, cycle ignition OFF → RUN 3 times ending in RUN, then follow the specific sensor training sequence.
- Touchscreen Reset (newer vehicles): Navigate to Vehicle Settings → TPMS Calibration → Calibrate, then complete a 20-30 minute drive cycle for the system to recalibrate.
Remember, a reset should only be performed after you have physically verified and corrected the pressure in all four tires (and the spare, if it has a sensor). Resetting the system with an underinflated tire will simply teach the system to accept a dangerously low pressure as « normal, » defeating the entire purpose of this crucial safety feature.
Direct vs. Indirect TPMS: Which System Is More Prone to False Alarms?
If your TPMS light seems to have a mind of its own, the type of system your car uses could be the culprit. Not all TPMS are created equal; they fall into two distinct categories: Direct (dTPMS) and Indirect (iTPMS). Understanding which one you have is key to diagnosing those frustrating « false » alarms. A Direct system uses battery-powered sensors inside each wheel to measure pressure and temperature directly, transmitting this data to the car’s computer. It’s precise, but it’s also more complex and has more potential points of failure (dead batteries, sensor damage).
An Indirect system, on the other hand, doesn’t measure pressure at all. It piggybacks on the car’s Anti-lock Brake System (ABS) wheel speed sensors. The logic is simple: an underinflated tire has a slightly smaller diameter, so it has to spin faster than the other tires to cover the same distance. The iTPMS detects this rotational variance and triggers the warning. This system is cheaper for manufacturers and has no batteries to replace, but it’s far more prone to what feel like false alarms. Anything that causes a wheel to spin at a different rate can trick it. This includes fitting a single new tire, uneven tire wear, or even sustained driving on a highly banked road. As the experts at Schrader TPMS Solutions point out in their technical documentation, this system has a critical blind spot:
if all four tires are similarly low in tire pressure from neglect or other reasons, an indirect system will not trigger a warning alarm
– Schrader TPMS Solutions, Direct TPMS Versus Indirect TPMS technical documentation
A key diagnostic clue is how the light behaves. A solid, steady TPMS light typically indicates low pressure. However, a TPMS light that flashes for 60-90 seconds upon startup and then stays solid is the universal signal for a system malfunction, not low pressure. This is your car telling you there’s a problem with the TPMS itself. In a dTPMS, this usually means a dead sensor battery, a damaged sensor, or a communication failure. In an iTPMS, it could indicate a fault with an ABS sensor that the system relies on. Another common source of confusion is the spare tire. Many vehicles with full-size spares include a TPMS sensor in that fifth wheel. If the pressure in the spare drops over time, it will trigger the light, leaving you searching for a problem in the four tires on the ground.
This table breaks down the common triggers for each system, based on an analysis of common TPMS issues.
| System Type | Common False Alarm Triggers | Root Cause | Diagnostic Indicator |
|---|---|---|---|
| Indirect TPMS | Uneven tire wear, fitting one new tire, sustained driving on banked roads, tire rotation | Uses ABS wheel speed sensors; detects minute differences in rotation speed, not actual pressure | Light appears after tire rotation or when tires have uneven wear patterns |
| Direct TPMS | Road salt corrosion, pothole/curb impacts, chemical damage from improper mounting lubricants, dead sensor battery | Hardware failure due to physical or chemical sensor damage, not measurement errors | Light flashes for 60-90 seconds then stays solid (indicates system malfunction) |
| Direct TPMS (Spare) | Forgotten spare tire sensor | Full-size spare has functional sensor that monitors pressure | Persistent TPMS light despite all four mounted tires showing correct pressure |
The Valve Stem Cap Mistake That Seizes Your $80 TPMS Sensor
One of the most insidious—and expensive—causes of TPMS failure has nothing to do with electronics and everything to do with basic chemistry. It often starts with something as innocent as replacing a lost plastic valve stem cap with a « fancier » metal one. This small mistake can trigger a destructive process called galvanic corrosion, effectively welding the cap to the valve stem and setting you up for a costly repair.

Most TPMS valve stems are made of aluminum. Many aftermarket metal caps are made of brass or steel. When you bring these two dissimilar metals into contact, and add an electrolyte like road salt or even simple moisture, you create a tiny battery. The aluminum stem becomes the « anode » and begins to sacrifice itself, corroding and depositing material onto the cap (the « cathode »). Over time, this corrosion fuses the two parts together. When you or a technician attempts to unscrew the cap for a simple air top-off, the force required is enough to snap the entire aluminum valve stem, destroying the integrated, non-replaceable sensor. Suddenly, a zero-cost valve cap has led to an $80+ sensor replacement plus labor.
Case Study: The Chemistry of a Snapped Sensor
An in-depth analysis of TPMS failures reveals the process of galvanic corrosion occurs when three conditions are met: dissimilar metals (aluminum valve stem and brass/steel cap), physical contact, and an electrolyte (moisture/road salt). The aluminum stem acts as the anode and dissolves into the moisture, depositing onto the brass cathode. Adding a steel or brass aftermarket valve cap introduces an additional cathode, accelerating external thread damage. The factory nickel-coated valve core acts as an insulator, but improper servicing with non-nickel-plated brass cores removes this protection, causing the valve stem to lose thickness and strength until attempting cap removal snaps the entire sensor stem.
The solution is twofold: prevention and proper materials. First, always use plastic or inert rubber valve caps on aluminum TPMS stems. They provide a perfectly adequate seal against dirt and moisture without introducing the risk of galvanic corrosion. Second, if you’re having tires serviced, ensure the shop uses the correct components. This is not the place to cut corners.
Action Plan: 5-Step TPMS Corrosion Prevention Protocol
- Component Refresh: Replace the retaining nut and seal with new anodized aluminum components every time the tire is serviced. This ensures a fresh, corrosion-free seal.
- Core Material: Insist on replacing the valve core with a new nickel-plated core only. Never allow a technician to use brass cores on aluminum stems, as this accelerates internal corrosion.
- Torque Specification: Ensure the retaining nut and valve core are properly torqued to manufacturer specifications using a torque-limiting driver. This prevents cracking the nickel coating, which would expose the underlying metal.
- Dry Inflation: Use dry shop air or, ideally, nitrogen to inflate the tire. This minimizes the amount of internal moisture, which acts as an electrolyte.
- Proper Cap: Always install a proper plastic or rubber-lined valve cap with an O-ring seal. This is the first line of defense against moisture and dirt entry into the delicate stem threads.
When to Replace TPMS Sensors: The Age Limit Most Shops Won’t Tell You
A flashing TPMS light on an older vehicle often points to a simple, unavoidable fact: the sensor’s battery is dead. What most drivers—and even some service advisors—don’t realize is that these batteries are not replaceable. As the Pirelli Tire Technical Team explains, « Most sensor models have built-in, non-replaceable batteries, so the only solution is to replace the whole sensor. » This is a crucial piece of information that turns TPMS sensors from a « fix when broken » part into a « wear and tear » maintenance item.
Most sensor models have built-in, non-replaceable batteries, so the only solution is to replace the whole sensor
– Pirelli Tire Technical Team, TPMS Technical Guide
The internal, sealed-for-life battery inside a direct TPMS sensor is constantly broadcasting a signal, and it has a finite lifespan. According to tire manufacturer technical specifications, the average battery life for an original equipment TPMS sensor is between 5 to 10 years. The exact lifespan depends on factors like driving habits (more driving means more transmitting) and climate. This means if you’re driving a car that is 7-10 years old and a sensor fails, it’s not a random fluke. It’s the beginning of the end for the rest of them. The other three are of the same age and have been subjected to the same conditions.
This is where proactive maintenance can save you significant time, money, and hassle. Many shops will replace only the single failed sensor. This seems logical, but it almost guarantees you’ll be back in a few months to replace the next one, and then the next, paying for labor to dismount and remount a tire each time. The smart, cost-effective strategy is to replace all four TPMS sensors at the same time you replace your tires. Since the tires are already off the wheels, the incremental labor cost to swap out the old sensors for new ones is minimal. This synchronizes the service life of your tires and sensors, preventing the frustrating cycle of recurring TPMS failures and ensuring another 5-10 years of reliable monitoring.
The Tire Sidewall Mistake That Leads to Cracked Rims on Highway Impacts
Ignoring a TPMS light isn’t just an annoyance; it’s a gamble with your safety and your wallet. The most immediate danger of driving on an underinflated tire is the increased risk of a catastrophic failure. An underinflated tire flexes excessively, building up a tremendous amount of heat in the sidewall. This heat degrades the rubber, weakening its structure and making it highly susceptible to a blowout, especially at highway speeds. Research from major tire manufacturers is clear on this point. For instance, Continental research indicates that approximately 40% of unexpected tire failures are caused by driving on significantly underinflated tires.
Beyond the risk of a blowout, there’s a significant mechanical risk to your wheels. Your tire’s sidewall is not just a container for air; it’s a critical part of your vehicle’s suspension system. It’s designed to absorb impacts from potholes, curbs, and road debris. When a tire is properly inflated, the air pressure provides the necessary stiffness for the sidewall to do its job, protecting the metal rim. However, when the tire is underinflated, the sidewall is soft and spongy. It can no longer provide adequate protection.
When an underinflated tire hits a sharp-edged pothole on the highway, the soft sidewall can compress completely. This allows the full force of the impact to be transferred directly to the edge of the wheel rim. The result is often a bent lip, a cracked wheel, or in severe cases, a shattered rim. This single mistake—ignoring the TPMS light and driving on low pressure—can transform a simple pothole encounter from a jarring bump into a multi-hundred-dollar repair involving a new wheel and potentially a new tire. The TPMS light is your first and best defense against this costly scenario.
Key Takeaways
- A solid TPMS light usually means low pressure, often due to cold weather. A flashing light signals a system malfunction, like a dead sensor.
- Never use metal valve caps on aluminum TPMS stems; the resulting galvanic corrosion can seize the cap and break the sensor.
- TPMS sensor batteries last 5-10 years. The most cost-effective strategy is to replace all four sensors proactively when you buy new tires.
How to Check Tire Tread Depth Using a Coin vs. a Gauge?
Your TPMS alerts you to issues with pressure, but the other critical aspect of tire safety is tread depth. Adequate tread is essential for grip, especially in wet or snowy conditions, as it channels water away from the contact patch to prevent hydroplaning. There are two common ways to check this at home: the coin test and a dedicated tread depth gauge. Both can give you an idea of your tire’s health, but they offer vastly different levels of precision.
The coin test is a quick, accessible method. In the United States, a penny is commonly used. You simply insert the penny into several tread grooves across the tire with Lincoln’s head upside down. If you can see the top of Abe’s head, your tread depth is below 2/32 of an inch, and the tire is legally worn out and unsafe. A quarter can provide a more conservative safety check; if you can see the top of Washington’s head, your tread depth is below 4/32 of an inch, which is the point where wet and snow performance begins to significantly degrade.
While the coin test is better than nothing, a dedicated tire tread depth gauge is a far superior tool for a few dollars. It provides a precise, numerical measurement, taking the guesswork out of the assessment. To use a gauge, you simply push the base of the tool flat against the tread block and extend the pin into the groove. The reading will show you the exact depth, typically in 32nds of an inch or millimeters. This precision is important because it allows you to detect not just wear, but uneven wear patterns across the tire—something the coin test can easily miss. Measuring the inner, center, and outer grooves can reveal issues with alignment (wear on one edge), overinflation (wear in the center), or underinflation (wear on both edges) long before they become a major problem.
How to Check Tire Tread Depth Using a Coin vs. a Gauge?
Having learned the methods, it’s crucial to understand the interpretation and why a gauge is the superior choice for proactive maintenance. The coin test provides a simple pass/fail at a single point, but a tread depth gauge tells a story. The legal minimum tread depth is not the same as the safe minimum tread depth. While wear bars and the penny test indicate the legal minimum tread depth of 2/32 inch (1.6mm), a tire’s ability to resist hydroplaning is drastically reduced well before that point. At 4/32 of an inch, your tire has already lost a significant amount of its wet-weather grip. At 2/32 of an inch, it has almost none.
A gauge allows you to monitor this decline and make an informed decision about when to replace your tires based on your driving conditions and safety tolerance, rather than waiting for them to become legally bald. For drivers in rainy or snowy climates, replacing tires at 4/32″ or even 5/32″ is a wise investment in safety. Furthermore, the precision of a gauge is your best tool for early diagnosis of other vehicle issues. If you take three measurements across a tire’s tread—outer, center, and inner grooves—and find a significant difference, you’ve discovered a problem:
- More wear on one shoulder (inner or outer): This is a classic sign of a wheel alignment problem (camber or toe). Correcting the alignment will save your new tires from the same fate.
- More wear in the center: This indicates chronic over-inflation. The tire is bulging in the middle, causing the center tread to wear out prematurely.
- More wear on both shoulders: This points to chronic under-inflation. The sides of the tread are doing most of the work, wearing down while the center is protected. This is the very condition your TPMS is designed to prevent.
In this way, a simple tread depth gauge, used consistently, becomes a powerful diagnostic tool that complements your TPMS. The TPMS watches the air, and the gauge watches the rubber. Together, they provide a complete picture of your tires’ health and your vehicle’s safety. Making this check a regular part of your vehicle maintenance routine is one of the most effective actions you can take.
Start today by investing a few dollars in a digital tread depth gauge. Make it a habit to check your tires once a month when you check your pressure. This small routine will empower you with the data needed to keep your vehicle safe, save money on premature tire replacement, and catch alignment or inflation issues before they cause serious damage.