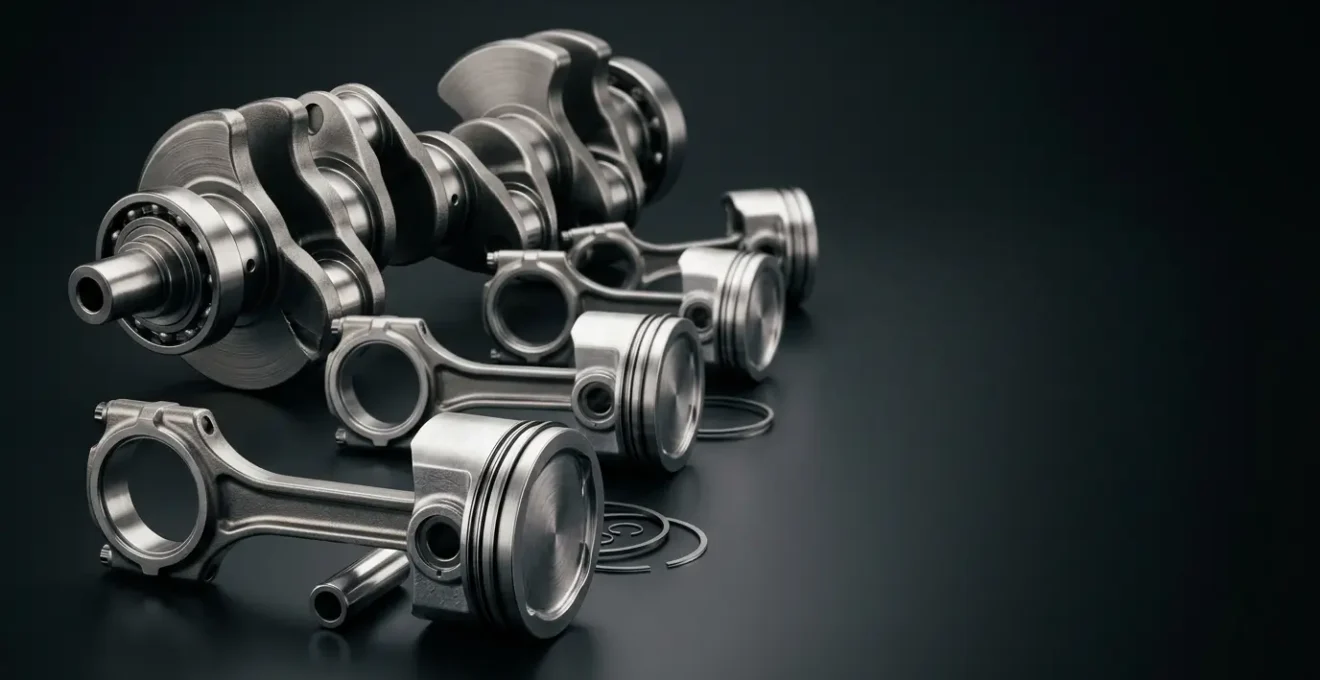
Achieving an extra 50,000 miles isn’t about magic additives; it’s about eliminating the microscopic failures that begin the day an engine is assembled.
- The physics of component interaction, where a thousandth of an inch in tolerance determines long-term reliability, is paramount.
- Material science—choosing forged over cast or MLS over composite—is a critical decision about heat and pressure management, not just cost.
- Modern engines are interconnected systems where a mechanical choice, like oil viscosity, can directly impact electronic functions like ADAS.
Recommendation: Focus on understanding the ‘why’ behind each component choice during a rebuild. This foundational knowledge is the only path to true engine longevity.
For any enthusiast dedicated to the art of engine building, the ultimate goal is a machine that is not only powerful but enduring. We’ve all heard the standard advice for engine longevity: regular oil changes, quality fluids, and gentle warm-ups. While essential, this is merely maintenance. For the builder aiming to add 50,000 miles of reliable service to an engine’s life, especially during a rebuild, the real work happens at a far more granular level. The common wisdom addresses the symptoms; a master builder addresses the root cause before the engine is even started for the first time.
The conversation must shift from simple part replacement to a deep understanding of component symbiosis. The secrets to a truly long-lived engine are not found in a catalog of performance parts but are hidden in the microscopic details—the thousandths of an inch of a piston ring gap, the specific alloy of a piston, or the multi-layered construction of a head gasket. These aren’t just components; they are a system where one small imprecision creates a tolerance cascade, leading to premature wear and eventual failure.
But what if the key to unlocking this durability wasn’t about buying the most expensive parts, but about selecting the *correct* parts based on a foundational understanding of engineering principles? This is the perspective of a master builder. It’s about recognizing that a subtle vibration isn’t just a nuisance but a warning, and that a ticking sound is the engine speaking a language you must understand.
This guide will deconstruct these critical interactions. We will move beyond the surface-level advice and dissect the specific, high-stakes decisions that determine whether your rebuild becomes a testament to durability or a cautionary tale. By examining the precise mechanics of failure, we will build a blueprint for longevity.
In this comprehensive guide, we will explore the critical component choices and diagnostic signs that separate a standard rebuild from one engineered for maximum lifespan. Follow along as we detail the engineering principles that will empower you to add tens of thousands of reliable miles to your engine.
Summary: How to Extend Engine Life by 50,000 Miles Using Precision Components?
- Why Loose Piston Ring Gaps Consume 1 Quart of Oil Every 1,000 Miles?
- Forged vs. Cast Pistons: Which Is Necessary for a Daily Driver with Turbo?
- The Subtle Vibration That Signals a Crankshaft Balance Issue Before It Explodes
- The « OEM-Spec » Part That Can Ruin Your Cylinder Head in 5,000 Miles
- When to Replace Hydraulic Lifters: The Ticking Sound You Must Not Ignore
- When to Change Your Timing Belt: The Age Limit vs. Mileage Dilemma?
- 0W-20 vs. 5W-30:Why Your Lane Keep Assist Pulls to the Right After Windshield Replacement?
- Which 3 Low-Cost Parts Are Secretly Ruining Your Gas Mileage?
Why Loose Piston Ring Gaps Consume 1 Quart of Oil Every 1,000 Miles?
The piston ring end gap is one of the most critical and misunderstood tolerances in engine building. A gap that is too tight can cause the ring ends to butt together under thermal expansion, leading to a seized piston and catastrophic engine failure. Conversely, a gap that is too loose creates a direct pathway for combustion pressure to escape into the crankcase, a phenomenon known as « blow-by. » This loss of compression is a significant power robber, but its effect on oil consumption is just as destructive.
Excessive blow-by pressurizes the crankcase and hinders the oil control rings’ ability to scrape oil effectively from the cylinder walls. Instead of being returned to the sump, oil is pushed past the rings and into the combustion chamber, where it is burned. This process is the primary cause of high oil consumption in engines with improper ring gaps. An engine consuming a quart of oil every 1,000 miles is not just « using » oil; it’s actively pumping it into the cylinders due to a failure in this critical seal.
Furthermore, this burned oil doesn’t simply disappear. It leaves behind hard carbon deposits on the piston crowns, valve heads, and in the ring lands themselves. These deposits can cause the rings to stick, exacerbating the blow-by issue and creating a vicious cycle of increasing oil consumption and decreasing performance. This is a classic example of a tolerance cascade, where a single, small imprecision of a few thousandths of an inch leads to a compounding and engine-damaging problem.
A larger gap increases blow-by and allows more oil to migrate into the combustion chamber, raising oil consumption and contributing to carbon formation.
– Goldfarb & Associates, Piston Ring End Gap: Why Precision Matters for Compression and Oil Control
Therefore, meticulously setting the piston ring end gap according to the manufacturer’s specifications for the engine’s intended use (naturally aspirated, turbocharged, etc.) is not just a best practice; it is a fundamental requirement for controlling oil consumption and ensuring long-term engine health.
Forged vs. Cast Pistons: Which Is Necessary for a Daily Driver with Turbo?
The choice between forged and cast pistons is a foundational decision in any engine build, especially for a turbocharged daily driver. While cast pistons are perfectly adequate for most naturally aspirated, stock applications, the introduction of forced induction fundamentally changes the thermal and mechanical stresses within the combustion chamber. Understanding the material science imperative behind this choice is crucial for building a durable engine.
Cast pistons are made by pouring molten aluminum into a mold. This process is cost-effective but can leave behind microscopic inconsistencies in the grain structure, making them more brittle. Forged pistons, by contrast, are created from a solid billet of high-grade aluminum alloy that is heated and pressed into shape under extreme pressure. This process aligns the alloy’s grain structure, resulting in a component that is denser and significantly stronger. In fact, real-world tests demonstrate that forged pistons can be up to 30% stronger than their cast counterparts.
This added strength is not just for high-horsepower race applications. For a daily driver with a turbo, the real challenge is managing repeated heat cycles and the sudden, immense pressure spikes of boost. As one expert notes, « Cast pistons work well in standard engines, but they may break or crack if exposed to extreme loads. » In a daily-driven scenario, these « extreme loads » can be as simple as an aggressive highway merge or an overly enthusiastic application of throttle. A forged piston provides the necessary margin of safety to withstand this abuse day after day without fatigue.
Some builders hesitate to use forged pistons in daily drivers due to their different thermal expansion rate, which can lead to « piston slap » or a light ticking noise when the engine is cold. However, modern forged alloys (like 4032) and advanced piston skirt coatings have largely mitigated this issue, offering a quiet operation that rivals cast pistons once at operating temperature.

For a turbocharged daily driver, the question is not one of peak power but of resilience. The superior strength and heat resistance of a forged piston are not overkill; they are a necessary investment in longevity, protecting the engine from the cumulative stress of daily boosted driving.
The Subtle Vibration That Signals a Crankshaft Balance Issue Before It Explodes
In a running engine, some vibrations are normal. However, a master builder develops a diagnostic acumen to distinguish between the benign hum of operation and the sinister tremor of impending failure. One of the most critical, and often ignored, of these is the subtle, frequency-specific vibration that signals a failing crankshaft harmonic balancer (or dampener). Ignoring this sign is akin to ignoring the rumbling of a volcano.
The harmonic balancer is not just a pulley for the accessory belts; it is a precisely tuned device designed to absorb and cancel out the torsional vibrations that naturally occur as the crankshaft twists and untwists with each power stroke. It typically consists of an inner hub, an outer inertia ring, and a rubber layer bonding them together. When this rubber deteriorates from age, heat, and oil exposure, or the outer ring becomes loose, the balancer loses its ability to dampen these destructive frequencies.
The first symptom is often a new, persistent vibration that can be felt in the chassis or steering wheel and changes with engine RPM. As CG Auto Center notes, « One of the most common signs of a failing harmonic balancer is excessive engine vibrations. » This isn’t just a comfort issue; it’s the crankshaft screaming for help. These unchecked vibrations transmit through the entire rotating assembly, putting immense stress on main bearings, the oil pump, and even the valve train.
The consequences of a complete failure are devastating. In the worst-case scenario, the outer ring can separate, becoming a high-velocity projectile in the engine bay, or the crankshaft itself can fracture from the accumulated stress. This demonstrates the principle of component symbiosis in its most brutal form: the failure of one part leads to the destruction of many others.
Case Study: Transmission Damage from Failed Harmonic Dampener Vibrations
The destructive force of an unbalanced crankshaft doesn’t stop at the engine block. As a detailed analysis from Underhood Service revealed, when a dampener loses its ability to absorb crankshaft vibration, these destructive forces transfer directly to the transmission. The vibrations can damage the transmission’s input shaft, bearings, and even planetary gears. On vehicles with large displacement engines and manual transmissions, the shockwaves are powerful enough to sustain damage to differential gears, all from a single failed balancer.
Listening to your engine and addressing a new, unexplained vibration immediately by inspecting the harmonic balancer is a critical step in preventing a catastrophic, and expensive, failure.
The « OEM-Spec » Part That Can Ruin Your Cylinder Head in 5,000 Miles
The term « OEM-Spec » can be dangerously misleading. For a builder focused on longevity, it’s crucial to understand that this often means a part meets the *minimum* requirements for a stock engine under warranty, not the *optimal* requirements for a rebuilt engine designed for another 100,000+ miles. Nowhere is this distinction more critical than with head gaskets, a component whose failure can quickly destroy a cylinder head or the entire engine. Indeed, one study found that diesel engine component failures account for nearly 41% of total engine failures, with gaskets being a key part of that group.
Many older or base-model engines came from the factory with a composite head gasket. It’s a low-cost, effective solution for stock compression and temperature levels. A builder replacing a failed gasket might naturally reach for another « OEM-Spec » composite gasket. This is a potential 5,000-mile mistake, especially on an engine that has been machined or will see even slightly increased performance.
The true « OEM-Spec » for modern, higher-output engines is the Multi-Layer Steel (MLS) gasket. An MLS gasket consists of multiple layers of embossed steel, providing superior sealing strength to handle the higher cylinder pressures of a healthy, rebuilt engine. Critically, it is far more resilient to the shearing forces between the head and block that occur during thermal expansion and contraction. A composite gasket is prone to « scrubbing » and failing under these conditions, while an MLS gasket is designed for it.
The catch is that an MLS gasket demands a much finer surface finish on both the cylinder head and the engine block. It requires a smooth, flat surface (typically 20-30 Ra or better) to seal properly, whereas a composite gasket is more forgiving of minor imperfections. Choosing an MLS gasket is not just a part swap; it’s a commitment to a higher standard of machine work during the rebuild. Opting for the « easy » composite gasket on a freshly machined head is a recipe for premature failure.
The following table illustrates why selecting the right gasket technology is a critical material science imperative for a long-lasting seal.
| Property | MLS (Multi-Layer Steel) | Composite |
|---|---|---|
| Sealing Capability | Excellent for high cylinder pressures and boost | Good for stock/low-pressure applications |
| Thermal Resistance | Superior – handles extreme heat cycles | Moderate – adequate for normal temperatures |
| Surface Requirements | Requires smooth, flat surfaces (20-30 Ra or less) | Conforms to slight imperfections |
| Durability Under Boost | Excellent – designed for forced induction | Limited – prone to failure under high boost |
| Reusability | Not recommended | Not recommended |
| Relative Cost | 20-100% higher than composite | Lower cost, budget-friendly |
When to Replace Hydraulic Lifters: The Ticking Sound You Must Not Ignore
A ticking sound from the valve train is one of the most common—and commonly misdiagnosed—noises in an internal combustion engine. While some light ticking can be normal, a distinct, persistent, or changing tick can be the first audible sign of a failing hydraulic lifter. Ignoring this sound is a gamble that can lead to a wiped camshaft lobe, sending metal debris throughout your engine’s lubrication system.
Hydraulic lifters are designed to maintain zero valve lash by using engine oil pressure to take up any slack between the camshaft, pushrod, rocker arm, and valve stem. This ensures quiet operation and eliminates the need for regular valve adjustments. A lifter fails when it can no longer hold this oil pressure, either because of internal wear, contamination from dirty oil, or a systemic oiling problem within the engine. When the lifter « collapses, » a gap is created in the valve train, and the impact of the components meeting with each revolution creates the characteristic ticking noise.
A light, « sewing machine » sound that disappears as the engine warms up might simply be a lifter that is slow to pump up with cold, thick oil. This is often called « lifter bleed-down » and, while not ideal, is less critical. However, a sharp, metallic « tap » that persists or worsens as the engine warms up is a dangerous signal. This often indicates a completely collapsed lifter or, more alarmingly, oil starvation to the top end of the engine. In this state, the lifter and the camshaft lobe are no longer separated by a film of oil, and rapid, destructive wear begins immediately.
Properly diagnosing the nature of the tick is paramount before deciding on a course of action. A single failing lifter can be replaced, but often, a ticking lifter is a symptom of a larger problem, such as worn cam bearings or a failing oil pump. Replacing all lifters and the camshaft as a matched set during a rebuild is the only way to guarantee a quiet and reliable valve train for the next 100,000 miles.
Action Plan: Diagnosing Hydraulic Lifter Tick
- Identify Sound Character: Differentiate between a light, rhythmic ‘sewing machine’ sound (less severe) and a sharp, intermittent ‘tap’ (more severe).
- Monitor Temperature Correlation: Note if the tick disappears when the engine warms (likely lifter bleed-down) or if it appears or worsens when hot, which is a dangerous sign of a collapsed lifter or oil starvation.
- Perform Cold-Start Observation: Listen for loud tapping during the first few seconds after startup, which can indicate a worn lifter unable to hold oil pressure while the engine is off.
- Check Systemic Oiling: Inspect the oil pressure gauge, consider the oil pump’s condition, and assess gallery cleanliness. A ticking lifter can be the first warning of a broader oiling system problem.
- Inspect Valve Train Components: If disassembly is possible, examine camshaft lobes, rocker arms, and pushrods for excessive or unusual wear patterns that often accompany lifter failure.
When to Change Your Timing Belt: The Age Limit vs. Mileage Dilemma?
The timing belt replacement interval is a source of constant debate and confusion. Most manufacturers provide a replacement interval based on mileage, typically between 60,000 and 100,000 miles. However, they also provide a time-based interval, often between 7 and 10 years. For owners of classic or low-mileage vehicles, this creates a dilemma: if the car has only covered 30,000 miles but is 12 years old, is a replacement really necessary? The unequivocal answer is yes.
A timing belt is made of a rubber composite, and like any rubber product, it degrades over time regardless of use. Ozone, heat cycles from the engine bay, and simple chemical aging cause the rubber to become brittle, hard, and prone to cracking. A belt that looks fine on the surface might have lost all its flexibility and be on the verge of snapping. A timing belt failure is one of the most catastrophic non-impact failures an interference engine can experience, leading to pistons colliding with valves and causing massive, often irreparable, damage.
The mileage interval accounts for the wear and tear of operation, while the age limit accounts for material degradation. Whichever comes first is the correct time for replacement. Postponing a replacement based on low mileage is a high-stakes gamble against chemical decomposition.

However, the most critical piece of wisdom a master builder can offer goes beyond just the belt itself. It’s about understanding the entire timing system as a single unit.
The most common cause of a new timing belt failing is a seized idler or tensioner pulley bearing. Insist that changing only the belt is a critical mistake; a complete kit (belt, tensioner, idlers, and often water pump) is the only way to ensure another 100,000 miles of reliability.
– Engine Pro Technical Team, Talking Precision Timing Sets With The Team At Engine Pro
The bearings in the tensioner and idler pulleys are subject to the same heat and age as the belt. When a new, tight belt is installed, it puts increased load on these old, worn bearings, causing them to fail. When they seize, the belt either snaps or is thrown off, leading to the very failure you were trying to prevent. The age vs. mileage debate is important, but the « kit vs. belt only » decision is what truly guarantees longevity.
0W-20 vs. 5W-30:Why Your Lane Keep Assist Pulls to the Right After Windshield Replacement?
The title of this section seems nonsensical, linking motor oil to a driver-assistance system. Yet, it perfectly illustrates the concept of systemic precision in modern vehicles. The answer lies in the complex, interconnected web of mechanical and electronic systems, where a seemingly minor deviation in one area can cause an unexpected fault in another. In this case, the link is Variable Valve Timing (VVT).
Modern engines rely on VVT systems to advance or retard camshaft timing on the fly, optimizing performance and fuel economy. These systems do not use separate electric motors; they use engine oil as hydraulic fluid. Precisely controlled solenoids direct oil flow to chambers within the cam phasers, rotating them relative to the camshaft. The speed and accuracy of this system are engineered around a very specific oil viscosity. As noted by industry experts, using a thicker 5W-30 oil in an engine designed for 0W-20 can slow the response time of the cam phasers. This leads to a measurable loss in performance and, critically, a deviation from the ECU’s expected engine behavior.
So, what does this have to do with Lane Keep Assist? Advanced Driver-Assistance Systems (ADAS), including lane keeping, are calibrated to function when the vehicle is operating within its expected parameters. After a windshield replacement, the forward-facing ADAS camera must be recalibrated to ensure it knows the precise center of the vehicle. This calibration process requires the vehicle’s powertrain to respond exactly as the master computer expects.
If the engine is running a slightly thicker oil (5W-30 instead of 0W-20), the VVT system’s response might be a few milliseconds slower than specified. This can cause a tiny lag or subtle change in engine torque during the calibration procedure. The hyper-sensitive ADAS computer can interpret this minute powertrain deviation as a physical misalignment, such as the car pulling to one side. The system then tries to « correct » this non-existent pull, resulting in a persistent steering input after the calibration is complete. The technician’s report might read « calibration failed » or « vehicle pulls right, » but the root cause is not the camera or the alignment; it’s the wrong grade of motor oil slowing down a hydraulic system by a fraction of a second.
This is the level of precision required in modern automotive engineering. A choice made at the oil cap can have tangible effects on the vehicle’s most advanced electronic safety systems, highlighting that every component and fluid is part of a single, deeply integrated machine.
Key Takeaways
- Tolerances Dictate Longevity: The smallest measurements, like piston ring gaps, have the largest impact on oil consumption and long-term engine health.
- Material Science is Not Optional: The choice between forged/cast or MLS/composite is a fundamental engineering decision about managing heat and pressure, not just cost.
- An Engine is an Interconnected System: A failure in one component, like a harmonic balancer, will create a destructive cascade effect on others, including the transmission. Similarly, a fluid choice can impact electronic systems.
Which 3 Low-Cost Parts Are Secretly Ruining Your Gas Mileage?
While major components determine an engine’s ultimate lifespan, a handful of inexpensive sensors and valves are the secret gatekeepers of fuel economy. When they begin to fail, they often do so « silently, » degrading performance and increasing fuel consumption long before they trigger a Check Engine Light. They don’t fail catastrophically; they just become lazy, inaccurate, and inefficient. For any owner looking to maintain peak efficiency, these three low-cost culprits should be at the top of the inspection list.
These components all work by providing the Engine Control Unit (ECU) with the data it needs to calculate the perfect air-fuel ratio. When this data becomes unreliable, the ECU is forced to make guesses, and it almost always guesses on the « rich » side (more fuel) to protect the engine, which directly harms your gas mileage. Identifying and replacing these parts can often restore 10-15% of lost fuel economy for a fraction of the cost of a major repair.
Here are the three most common low-cost parts secretly ruining your fuel efficiency:
- Lazy Oxygen (O2) Sensor: An aging O2 sensor doesn’t stop working; its reaction time just slows down. This forces the ECU to maintain a rich fuel condition for longer than necessary during throttle changes, wasting a small amount of fuel on every single acceleration. Over a tank of gas, this adds up significantly.
- Contaminated Mass Air Flow (MAF) Sensor: A microscopic film of oil or dirt from the air filter can insulate the MAF’s sensitive hot wire. This causes it to under-report the volume of incoming air. The ECU then injects insufficient fuel, forcing the driver to use more throttle (and thus, more gas) to achieve the desired performance.
- Stuck-Open PCV (Positive Crankcase Ventilation) Valve: This sub-$20 part is designed to vent crankcase pressure. When it sticks open, it creates a constant, unmetered vacuum leak. This allows air into the intake manifold that the MAF sensor never saw, confusing the ECU and leading to a lean condition, rough idle, and poor fuel economy as the system struggles to compensate.
As one analysis of engine trends points out, « Advanced sensors allow engines to monitor airflow, temperature, pressure, and timing in real time. These systems identify issues early and help optimize fuel and air delivery. » Maintaining the health of these simple sensors is the easiest way to ensure the entire complex system is running as efficiently as designed.
Armed with this knowledge, you are no longer just assembling parts; you are engineering durability. Approach your next build with this meticulous focus on the ‘why’ behind each tolerance and material choice. The result will be an engine that performs not just for a season, but for the many thousands of miles you intend it for.